Grab 1 OF My Blinkies


My Logo

My Licenses


ChocUkDesigns On Facebook


Friday 27 February 2015
CT ChocUkDesigns For Dance In The Rain PTU Tutorial For Cute Helen Scrap Kit
CT ChocUkDesigns For Dance In The Rain
PTU Tutorial For Cute Helen Scrap Kit


DO NOT COPY AND SHARE
PLEASE DIRECT PEOPLE TO MY BLOG
DO NOT CLAIM AS YOUR OWN
Supplies Need:-
Scrap Kit Used: DITR's - Cute Helen Kit
Which You Can Also Purchase Exclusively At:-
PicsForDesign:-
Tube: Stan Dudin - Cute Helen
Please Note You Need A License To Use This Tube
You Can Purchase At PicsForDesign:-
Plug Ins: EyeCandy 4000 - Gradient Glow
Font Of Choice
A Working knowledge Of PSP
Lets Begin With My Tutorial
Open PSP and Your Tube
Open a New 700 x 700 Resolution 200
Using The Following Drop Shadow UNLESS STATED:-
V&H: 1 OP: 60 Blur: 2 Color: Black
Repeat With V&H: -1
Open & Copy The Following Elements:-
66
2 - Resize By 60%
3 - Resize By 30%
33 - Resize By 50%
44 - Resize By 50%
48 - Resize By 50% - Mirror
34 - Resize By 25%
27 - Resize By 30%
23 - Resize By 70%
62 - Resize By 40%
75
Layers - Arrange - Send To Bottom
Activate Eraser Tool
Erase All Parts Of Paper That is Hanging Out Of Frame
4 - Resze By 50% - Mirror
Open & Copy Paper 18
Activate Eraser Tool
Erase All Parts Of Paper That is Hanging Out Of Frame
Activate & Copy Tube
Paste As New Layer & Resize By 50%
Open & Copy The Following Elements :-
58 - Resize By 50%
26 - Resize By 50%
31 - Resize By 50%
72 - Resize By 50%
67 - Resize By 20% - Mirror
55
Layers - Arrange - Send To Bottom
41 - Resize By 75%
Layers - Duplicate - Mirror
Layers - Duplicate
Activate Top Layer
Layers New Raster Layer - Add All Copyright Info
Layers New Raster Layer - Add Watermark
Layers New Raster Layer
Select Your Text Tool
Select Your Font I have used
FrancineHmk - Size 65 (resize To Preferred) - Stroke 2 - Bold
Click Foreground and change to #e63486
Click Background and Change to #fcd6de
Type Your Name
Convert Raster To Layer
Plug Ins: Eyecandy 4000 - Gradient Glow
Color: #ffd6dd
Glow Width: 5.00
Soft Corners: 25
Overall Op: 100
Draw Only Outside Selection Checked
Click Ok
All Done
Thank you very much for following my Tutorial
I would love to see your results
and
any feedback
Please Email Me
At
Dont Forget To Check-Out DITR's Blog
Tutorial Written By ChocUkDesigns
Retained by "Copyright © ChocUkDesigns 2015 All rights Reserved"
ZGLE-D8IM-UK0E-CMVX
Wednesday 25 February 2015
CT ChocUkDesigns For Dance In The Rain PTU Tutorial For Steampunk Beauty Scrap Kit
CT ChocUkDesigns For Dance In The Rain
PTU Tutorial For Steampunk Beauty Scrap Kit


DO NOT COPY AND SHARE
PLEASE DIRECT PEOPLE TO MY BLOG
DO NOT CLAIM AS YOUR OWN
Supplies Need:-
Scrap Kit Used: DITR's - Steampunk Beauty Kit
Which You Can Also Purchase Exclusively At:-
Smiley Creations Shop:-
Tube: Chris Pastel - Marianne
Please Note You Need A License To Use This Tube
You Can Purchase At PicsForDesign:-
Plug Ins: Greg's Factory Output Vol.II - Poolshadow
Alien Skin Eye Candy 5: Impact - Glass
EyeCandy 4000 - Gradient Glow
Font Of Choice
A Working knowledge Of PSP
Lets Begin With My Tutorial
Open PSP and Your Tube
Open a New 700 x 700 Resolution 200
Using The Following Drop Shadow UNLESS STATED:-
V&H: 1 OP: 60 Blur: 2 Color: Black
Repeat With V&H: -1
Open & Copy The Following Elements:-
98 - Resize By 65%
29 - Resize By 75% - Mirror
Layers - Arrange - Move Down
Layers - Duplicate - Flip - Mirror
144 - Resize By 65%
10 - Resize By 40%
9 - Resize By 40%
174 - Resize By 35%
167 - Resize By 65%
Activate Top Layer
Open & Copy Paper 15
Paste As New Layer & Resize By 60%
Layers - Arrange - Move Down
Adjust - Blur - Gaussian Blur - 3
Activate Close Up Of Tube & Free Hand Selection Tool
Draw Round Her Head & Copy As Merged
Paste As New Layer & Resize By 60% - Mirror
Move To Inside Frame
Plug In: Greg's Factory Output Vol.II - Poolshadow:-
Diagonal: 50
Center: 50
Horizontal: 50
Diagonal: 50
Horizontal: 50
Vertical: 50
Intensity: 128
Lightness: 128
Click Ok
Layers - Properties - Blend Mode: Luminance (Legacy)
Activate Top Layer & Magic Wand
Click Inside Frame & Selections - Modify - Expand By 4
Plug In: Alien Skin Eye Candy 5: Impact - Glass:-
With These Settings:-
Basic Tab: See Diagram
Glass Color: #a97957

Lighting Tab: See Diagram
Highlight Color: White

Bevel Profile:
Factory Profile: Button
Click Ok
KEEP SELECTED
Selections - Modify - Expand By 10, Invent
Hit Delete On Your Keyboard For Tube & Paper Layer
Selections - None
Activate Top Layer Again - Mirror
Activate Full Version Of Tube & Copy
Paste As New Layer & Resize By 45%
Open & Copy The Following Elements:-
61 - Resize By 30%
12 - Resize By 25% - Free Rotate Left By 22 Degrees
160 - Resize By 20%
163 - Resize By 25%
64 - Resize By 25%
75 - Resize By 20%
55 - Resize By 25% - Free Rotate Right By 22 Degrees - Mirror
50 - Resize By 35%
21 - Resize By 40%
22 - Resize By 40%
171 - Resize By 40%
165 - Resize By 50%
Activate Top Layer
92 - Resize By 25% - Free Rotate Left By 22 Degrees
94 - Resize By 20% - Mirror
93 - Resize By 20%
Activate Top Layer
Layers New Raster Layer - Add All Copyright Info
Layers New Raster Layer - Add Watermark
Layers New Raster Layer
Select Your Text Tool
Select Your Font I have used
Time To Get A Watch - Size 85 (resize To Preferred) - Stroke 2 - Bold
Click Foreground and change to #633a1e
Click Background and Change to #e4ad10
Type Your Name
Convert Raster To Layer
Plug Ins: Eyecandy 4000 - Gradient Glow
Color: #e1bca1
Glow Width: 5.00
Soft Corners: 25
Overall Op: 100
Draw Only Outside Selection Checked
Click Ok
Adjust - Sharpen - Sharpen More
Repeat Plug In
Adjust - Shapren - Sharpen More
All Done
Thank you very much for following my Tutorial
I would love to see your results
and
any feedback
Please Email Me
At
Dont Forget To Check-Out DITR's Blog
Tutorial Written By ChocUkDesigns
Retained by "Copyright © ChocUkDesigns 2015 All rights Reserved"
JNFL-T14Q-N2CB-BDEJ
Tuesday 24 February 2015
NEW RELEASES - OVER THE RAINBOW CLUSTER PACK & MEGA PACK
NEW RELEASES - OVER THE RAINBOW CLUSTER PACK & MEGA PACK

Over The Rainbow Cluster Pack
ONLY $1!!!!!!!!!!
In All My Stores Check Them Out ;)
PicsForDesign

Over The Rainbow Mega Pack
ONLY $1.50!!!!!!!!!!
For Both Scrap Kit & 3x Cluster Frames
In All My Stores Check Them Out ;)
PicsForDesign
Monday 23 February 2015
TAG & PTU TUTORIAL SHOW OFF By CT Divaz Dezignz By Vi Using My Scrap Kit Lucky Shamrocks
TAG SHOW OFF
Just Wanted To Show Off This Beautiful Tag Made For Me
By Divaz Dezignz By Vi Using
My New PTU Scrap Kit Lucky Shamrocks
My New PTU Scrap Kit Lucky Shamrocks

Check-Out Her Blog As She Written An Awesome
Tutorial As Well!!!!!!
http://dzdezignz.blogspot.co.uk/2015/02/ct-ad-n-tut-for-ptu-kit-lucky-shamrocks.html

Tutorial As Well!!!!!!
http://dzdezignz.blogspot.co.uk/2015/02/ct-ad-n-tut-for-ptu-kit-lucky-shamrocks.html
A Cute St Patricks Day Themed Kit Full Of Lots Of Little Goodies
Comes With 123x Elements & 25x Papers
Only $1!!!!!!!!
Comes With 123x Elements & 25x Papers
Only $1!!!!!!!!
You Can Purchase My Scrap Kit
At My New Homes:-
PicsForDesign
CT ChocUkDesigns For Swan Scraps & Dance In The Rain PTU Tutorial For Melinda & In My Heart Scrap Kit
CT ChocUkDesigns For Swan Scraps & Dance In The Rain
PTU Tutorial For Melinda & In My Heart Scrap Kit


DO NOT COPY AND SHARE
PLEASE DIRECT PEOPLE TO MY BLOG
DO NOT CLAIM AS YOUR OWN
Supplies Need:-
Tube: Swan Scraps - Melinda
Please Note You Need A License To Use This Tube
You Can Purchase At PicsForDesign :-
Scrap Kit Used: DITR's - In My Heart Kit
Which You Can Also Purchase At
PicsForDesigns:-
Or
Smiley Shop Creations
Plug Ins: EyeCandy 4000 - Gradient Glow
Font Of Choice
A Working knowledge Of PSP
Lets Begin With My Tutorial
Open PSP and Your Tube
Open a New 713 x 763 Resolution 200
Using The Following Drop Shadow UNLESS STATED:-
V&H: 1 OP: 60 Blur: 40 Color: Black
Repeat With V&H: -1
Open & Copy The Following Elements:-
112 - Resize By 120%
134 - Resize By 75%
Layers - Arrange - Move Down
Activate Eraser Tool & Erase The Heart Sticking Out Of Frame On Right Handside
Activate Frame Layer
113 - Resize By 77%
Move On To Left Handside Of Frame
Dont Worry About The Frame Bits Poking Out ;)
118 - Resize By 30%
9 - Resize By 30%
Layers - Duplicate - Mirror
95 - Resize By 50% & Free Rotate Left By 90 Degrees
115 - Resize By 43% & Mirror
Open Paper 5 & Copy
Paste As New Layer & Resize By 50%
Move To Inside Frame
Layers - Arrange - Send To Bottom
Activate Top Layer & Tube
Copy & Paste As New Layer
Resize By 50% & Mirror
Activate Frame Layer Again
Open & Copy The Following Elements:-
25
11 - Resize By 30%
4 - Resize By 50%
1 - Resize By 20% & Then Resize By 85% - NO DS NEEDED
Layers - Duplicate
26 - Resize By 50%
7 - Resize By 50% & Free Rotate Left By 22 Degrees
133 - Resize By 25% & Free Rotate Left By 44 Degrees
76 - Resize By 30%
14 - Resize By 15%
74 - Resize By 30%
Activate Tube Layer
16 - Resize By 30%
2 - Resize By 20%
Activate Top Layer
Layers New Raster Layer - Add All Copyright Info
Layers New Raster Layer - Add Watermark
Layers New Raster Layer
Select Your Text Tool
Select Your Font I have used
Good Vibrations - Size 95 (resize To Preferred) - Stroke 2 - Bold
Click Foreground and change to #ae1617
Click Background and Change to #dc3333
Convert Raster To Layer
Plug Ins: Eyecandy 4000 - Gradient Glow
Color: #ffa2a2
Glow Width: 5.00
Soft Corners: 25
Overall Op: 100
Draw Only Outside Selection Checked
Click Ok
Repeat Plug In
All Done
Thank you very much for following my Tutorial
I would love to see your results
and
any feedback
Please Email Me
At
Dont Forget To Check-Out Swan Scrap's Blog
&
DITR's Blog
Tutorial Written By ChocUkDesigns
Retained by "Copyright © ChocUkDesigns 2015 All rights Reserved"
UEQK-4LOI-JPUX-WAOL
Saturday 21 February 2015
CT ChocUkDesigns For Swan Scraps & Dance In The Rain PTU Tutorial For Patty & Kiss Me I'm Irish Scrap Kit
CT ChocUkDesigns For Swan Scraps & Dance In The Rain
PTU Tutorial For Patty & Kiss Me I'm Irish Scrap Kit


DO NOT COPY AND SHARE
PLEASE DIRECT PEOPLE TO MY BLOG
DO NOT CLAIM AS YOUR OWN
Supplies Need:-
Tube: Swan Scraps - Patty
Please Note You Need A License To Use This Tube
You Can Purchase At PicsForDesign :-
Scrap Kit Used: DITR's - Kiss Me I'm Irish Kit
Which You Can Also Purchase At
PicsForDesigns:-
Or
Smiley Shop Creations
Mask: MC_MisfitMask4_3.12 (Melissa)
Which You Can Download From
The Creative Misfits' Blog
Plug Ins: EyeCandy 4000 - Gradient Glow
Font Of Choice
A Working knowledge Of PSP
Lets Begin With My Tutorial
Open PSP and Your Tube
Open a New 700 x 700 Resolution 200
Using The Following Drop Shadow UNLESS STATED:-
V: 1H: -1 OP: 60 Blur: 40 Color: Black
Open & Copy Element 35
Paste As New Layer & Resize By 70%
Open & Copy 95
Paste As New Layer & Resize By 50%
Layers - Arrange - Move Down
Open & Copy Paper 5
Paste As New Layer & Resize By 50% - Mirror
Move To Inside Frame
LAyers - Arrange - Move Down
Activate Frame Layer & Magic Wand
Click In Side Frame
Selections - Modify - Expand By 25
Selections - Invent
Activate Paper Layer & Hit Delete On Your Keyboard
Selections - None
Activate Frame Layer & Then Tube
Copy Full Version & Paste As New Layer
Resize By 50% & Mirror & Move To Right Handside Of Frame
Activate Eraser Tool & Erase Bottom Parts OF Tube
So Your Tube Pops Out The Frame
Activate Frame Layer Again
Open & Copy The Following Elements:-
100 - Resize By 80%
Layers - Arrange - Move Down
Activate Frame Layer Again
1 - Resize By 40%
117 - Resize By 30%
24 - Resize By 50%
85 - Resize By 60%
25 - Resize by 30%
42 - Resize By 50%
26 - Resize By 30% - Mirror
120 - Resize By 30%
Activate Tube Layer
90
Layers - Duplicate
41 - Resize By 50% & Then Again By 50%
Layers - Duplicate
Layers - Duplicate - Resize By 50%
Layers - Duplicate
52 - Resize By 30%
Place The Barrel On Right Side Of Tube
Activate Eraser Tool & Erase The Part Of The Barrel Covering Her Arm
Activate Top Layer
152 - Resize By 85%
Open Paper 19
Layers - Promote Background Layer To Raster - New Mask Layer From Image
Select Mask - MC_MisfitMask4_3.12
Make sure Source Luminance is checked only
Copy Merged and Paste as new layer
Resize By 70%
Layers - Arrange - Send To Bottom
Activate Top Layer
Layers New Raster Layer - Add All Copyright Info
Layers New Raster Layer - Add Watermark
Layers New Raster Layer
Select Your Text Tool
Select Your Font I have used
ChopinScript - Size 80 (resize To Preferred) - Stroke 2 - Bold
Click Foreground and change to #4daa38
Click Background and Change to #e6e841
Convert Raster To Layer
Layers - Duplicate
Activate Bottom Font Layer
Plug Ins: Eyecandy 4000 - Gradient Glow
Color: #acd85f
Glow Width: 10.00
Soft Corners: 25
Overall Op: 100
Draw Only Outside Selection Checked
Click Ok
Adjust - Add/Remove Noise - Add Noise - Gaussian, 50% & Monochrome
Adjust - Sharpen - Sharpen More
Activate Top Font Layer
Plug Ins: Eyecandy 4000 - Gradient Glow
Color: #acd85f
Glow Width: 3.00
Soft Corners: 25
Overall Op: 100
Draw Only Outside Selection Checked
Click Ok
Adjust - Sharpen - Sharpen More
All Done
Thank you very much for following my Tutorial
I would love to see your results
and
any feedback
Please Email Me
At
Dont Forget To Check-Out Swan Scrap's Blog
&
DITR's Blog
Tutorial Written By ChocUkDesigns
Retained by "Copyright © ChocUkDesigns 2015 All rights Reserved"
BOEY-4KFP-ZRWZ-KJ59
Friday 20 February 2015
CT ChocUkDesigns For Swan Scraps & Dance In The Rain PTU Tutorial For Valentine & My Lucky Charm Scrap Kit
CT ChocUkDesigns For Swan Scraps & Dance In The Rain
PTU Tutorial For Valentine & My Lucky Charm Scrap Kit


DO NOT COPY AND SHARE
PLEASE DIRECT PEOPLE TO MY BLOG
DO NOT CLAIM AS YOUR OWN
Supplies Need:-
Tube: Swan Scraps - Valentine
Please Note You Need A License To Use This Tube
You Can Purchase At PicsForDesign :-
Scrap Kit Used: DITR's - My Lucky Charm Kit
Which You Can Also Purchase At
PicsForDesigns:-
Or
Smiley Shop Creations
Plug Ins: Mura's Seamless - Blend Emboss At Alpha
Xero - Porcelain
Xero - Radiance
EyeCandy 4000 - Gradient Glow
Font Of Choice
A Working knowledge Of PSP
Lets Begin With My Tutorial
Open PSP and Your Tube
Open a New 700 x 700 Resolution 200
Using The Following Drop Shadow UNLESS STATED:-
V: 1H: -1 OP: 60 Blur: 40 Color: Black
Open & Copy Frame 7
Paste As New Layer & Resize By 75%
Move To Upper Left Handside Of Canvas
Open & Copy Frame 4
Paste As New Layer & Resize By 75%
Move To Lower Middle OF Canvas
Open & Copy Frame 8
Paste As New Layer & Resize By 75%
Move To Left Handside Of Frame 4
Activate Frame 7 Layer & Selection Tool
Draw Round The Top Half Of Tube & Copy As Merged
Paste As New Layer & Place Inside Frame
Layers - Arrange - Move Down
Open & Copy Paper 8
Paste As New Layer & Resize By 60%
Move Again Into Inside Frame
Layers - Arrange - Move Down
Working On Paper Layer
Adjust - Blur - Gaussian Blur - Radius 2
Adjust - Add/Remove Noise - Add Noise - Gaussian, 10%, Monochrome Checked
Open & Copy Element Sparkles 2
Paste As New Layer - Resize By 20% - NO DS NEEDED
Free Rotate Right By 50%
Move To Gap Between Frame & Tube
Layers - Duplicate
Layers - Merge - Merge Down
Layers - Duplicate - Mirror - Flip
Again Move To Gap Between Frame & Tube
Layers - Merge - Merge Down
Activate Eraser Tool & Erase The Parts Underneith Tube
Activate Tube Layer
Layers - Properties - Blend Mode: Luminance Legacy
Plug In: Mura's Seamless - Blend Emboss At Alpha:-
Base Color R: 128
Base Color G: 128
Base Color B: 128
Emboss 64
Base <-> Source: 255
Opaque Emboss: 128
Clik Ok
Repeat Plug In
Plug In: Xero - Porcelain
Softness: 50
Strength: 128
Brightness: 128
Red Channel: 0
Green Channel: 0
Blue Channel: 255
Click Ok
Plug In: Xero - Radiance
Strength: 50
Charm: 50
Truth: 128
Beauty: 255
Click Ok
Activate Frame Layer & Magic Wand
Click Outside Frame & Selections, Invent
Selections - Contract By 10 - Invent
KEEP SELECTED
Activate Tube Layer & Hit Delete On Your Keyboard
KEEP SELECTED
Activate Paper Layer & Hit Delete Again
Selections None
Activate Eraser Tool & Erase Any Parts Of The Paper
That May Have Been Missed Round The Outside Of The Shamrocks
Activate Frame 4 Layer
Open & Copy The Following Elements:-
Coins 1 - Resize By 20%
Layers - Duplicate
Whiskey Bottle 3 - Resize By 25%
Whiskey Bottle 4 - Resize By 30% - Free Rotate Left By 22 Degrees
Doodle2 - Resize By 50%
Barrel - Resize By 50%
Clover Cluster - Resize By 85%
Beer 3 - Resize By 50%
Beer Glass - Resize By 50%
Beer 2 - Resize By 15%
Beer 1 - Resize By 30% - Mirror
Wordart 2 - Resize By 50%
Move To Top Of Right Handside Of Frame
Activate Tube Layer
Layers - Duplicate - Mirror
Layers - Arrange - Move Up x2
Move To Top Part Of Frame
Open & Copy Paper 12
Paste As New Layer & Resize By 60%
Move To Inside Right Handside Frame
Activate Frame Layer Again & Magic Wand Tool
Click Inside Right Handside Frame
Selections - Expand By 8, Invent
Activate Paper Layer & Hit Delete On Your Keyboard
Selections None
Now Working On Left Part Of Frame
Open & Copy The Following Elements:-
Tower - Resize By 75% - NO DS NEEDED
Layers - Arrange - Move Down
Pot Of Gold Cluster - Resize By 70% - NO DS NEEDED
Activate Frame Layer Again
Chain 2 - Resize By 50%
Coins 2 - Resize By 50%
Doodle 1 - Resize By 20% - Flip
Activate Tower Layer
Copy & Copy Paper 15
Paste As New Layer & Resize By 35%
Layers - Arrange - Move Down
Activate Frame Layer & Magic Wand Tool
Using Same Settings As For Right Handside Frame
This Time KEEP DELETED
Activate Pot Of Gold Layer & Hit Delete On Your Keyboard
KEEP SELECTED
Repeat For Tower Layer & Paper LAyer
Once Done
Selections None
Activate 1st Version of tube again
Layer Duplicate
Layes - Arrange - Bring To Top
Layers - Arrange - Move Down
Move To Position In Top Ring
Layer Duplicate
Move To Position In Middle Ring
Layers - Duplicate
Move To Position In Bottom Ring
Activate Tube In Top Ring
Open & Copy Paper 6
Paste As New Layer & Resize By 50%
Move To Inside Rings
Layers - Arrange - Move Down
Activate Frame & Magic Wand Tool
Click Inside Bottom Ring
Selections - Modify - Expand By 5
Select Tube Layer & Hit Delete
Repeat For Each Ring & Tube Layer
Activate Top Layer Again
HOLDING SHIFT Click Inside Each Ring
Again Repeat Above Expansion & Invent
Activate Paper Layer & Hit Delete On Your Keyboard
Activate Top Layer Again
Activate Full Version Of Tube & Copy As Merged
Paste As New Layer & Resize By 60%
Mirror & Place In The Middle Of Frame 4
Open & Copy The Folllowing Elements:-
Bow 3 - Resize by 35%
Move To Top Of Ring Frame
Clover Branch - Resize By 20%
Clover 4 - Resize By 50%
Clover 1 - Resize By 40%
Butterfly 2 - Resize By 25% - Free Rotate Left By 11 Degrees
Clover Bunch - Resize by 40%
Layers - Duplicate
Layers - Duplicate - Mirror
Layers - Duplicate
Activate Top Layer
Layers New Raster Layer - Add All Copyright Info
Layers New Raster Layer - Add Watermark
Layers New Raster Layer
Select Your Text Tool
Select Your Font I have used
2Peas Mister Giggle - Size 72 (resize To Preferred) - Stroke 2 - Bold
Click Foreground and change to #feee1d
Click Background and Change to #008f19
Type Your Name Objects - Align - Horiz Center On Canvas
Convert Raster To Layer
Plug Ins: Eyecandy 4000 - Gradient Glow
Color: #acd85f
Glow Width: 10.00
Soft Corners: 25
Overall Op: 100
Draw Only Outside Selection Checked
Click Ok
All Done
Thank you very much for following my Tutorial
I would love to see your results
and
any feedback
Please Email Me
At
Dont Forget To Check-Out Swan Scrap's Blog
&
DITR's Blog
Tutorial Written By ChocUkDesigns
Retained by "Copyright © ChocUkDesigns 2015 All rights Reserved"
PCMS-6KVI-ZUTF-V6Q1
Thursday 19 February 2015
NOW SELLING AT PICSFORDESIGN!!!!!!!!!!
Hi Guys I Am Now Selling At PicsForDesign!!!!

Check-Out My Scrap Kits
Only $1 Each!!!!!!!!
Tuesday 17 February 2015
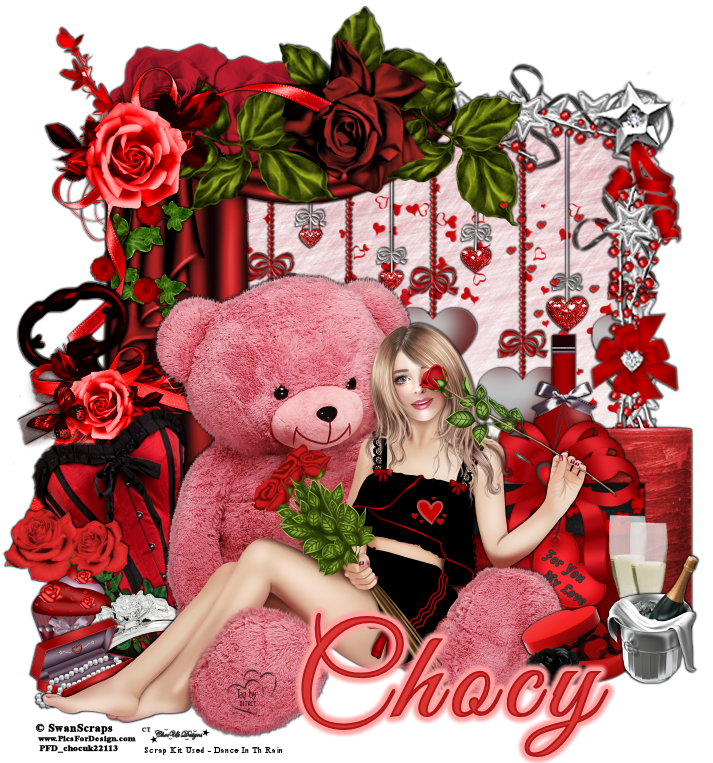
CT ChocUkDesigns PTU Tutorial For ChocUkDesigns Here For You Scrap Kit Taken From The Here For You Collab
Tag Show Off For ChocUkDesigns
PTU Tutorial For Here For You Scrap Kit
Taken From The Here For You Collab


DO NOT COPY AND SHARE
PLEASE DIRECT PEOPLE TO MY BLOG
DO NOT CLAIM AS YOUR OWN
Supplies Need:-
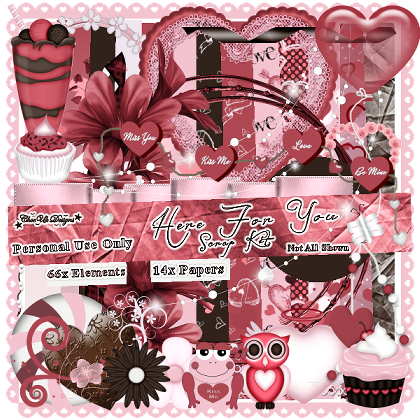
Scrap Kit Used: ChocUkDesigns - Here For You
Which is Part of the Here For You Collab
You Can Also Purchase This Awesome Collab At:-
Scraps N Company:-
Or
Spazz'd Art
Tube: Ellie Milk - Exclusive Tube - Lollipop
Please Note You Need A License To Use This Tube
You Can Purchase At PicsForDesign
With An Exclusive Membership
Mask: Creative Misfits Creations - Nicole - Mask 4
Which You Can Download
Plug Ins - Xero - Radiance
Eyecandy 4000 - Gradient Glow
Font Of Choice
A Working knowledge Of PSP
Lets Begin With My Tutorial
Open PSP and Your Tube
Open a New 700 x 700 Resolution 200
Use The Following Drop Shadow UNLESS STATED:-
V&H: 1 OP: 80 Blur: 10 Color: Black
Repeat With V&H -1
Open & Copy Frame 4
Paste As New Layer & Resize By 55%
Activate Tube & Copy As Merged
Paste As New Layer & Resize By 45%
Activate Eraser Tool
Erase The Bottom Part Of Tube To Give The Pop-Out Effect
Open & Copy Paper 5
Paste As New Layer & Resize By
Layers - Arrange - Send To Bottom
Move To Inside Frame
Activate Magic Wand Tool & Frame Layer
Click Inside Frame & Selections - Modify - Expand By 4
Selections - Invent
Select Paper Layer & Hit Delete On Your Board
Selections None
Keep Paper Layer Activated
Adjust - Blur - Gaussian Blur - 2
Adjust - Add/Remove Noise - Add Noise
Gaussian - 25% & Monochrome Checked
Activate Frame Layer
Open & Copy The Following Elements:-
Balloon1 - Resize By 40% - Mirror - NO DS NEEDED
Balloon2 - Resize By 35% - Mirror - NO DS NEEDED
Balloon3 - Resize By 30% - Mirror - NO DS NEEDED
Flower1 - Resize By 35%
Layers - Duplicate
Layers - Duplicate & Resize By 98%
Flower3 - Resize By 20%
Flower4 - Resize By 20%
Milkshake2 - Resize By 50% - Mirror
Cupcake1 - Resize By 35% - Mirror
Candy1 - Resize By 20%
Cupcake2 - Resize By 15%
ChocHeart1 - Resize By 20% - Mirror
Owl - Resize By 20%
Angelheart2 - Resize By 70% - Free Rotate Left By 22 Degrees
Kitty - Resize By 30% - Mirror
Butterflys - Any Colors - Resize By 20% & Free Rotate Left Of Right By 22 Degrees
Lights3 - Flip - Free Rotate Left 22 Degrees - NO DS NEEDED
Layers - Duplicate
Layers - Merge - Merge Down
Activate Eraser Tool
Erase The Parts Of The Light That Cover Most Of Your Tube
Doodle1 - Resize By 50%
Layers - Arrange - Send To Bottom
Layers - Duplicate - Mirror
Open Paper 10
Layers - Promote Background Layer To Raster - New Mask Layer From Image
Select Mask - Creative Misfits Creations - Nicole - Mask 4
Make sure Source Luminance is checked only
Copy Merged and Paste as new layer
Layers - Arrange - Send To Bottom
Resize By 95%
Activate Your Top Layer
Layers New Raster Layer - Add All Copyright Info
Layers New Raster Layer - Add Watermark
Layers New Raster Layer
Select Your Text Tool
Select Your Font I have used Before The Rain (resize To Preferred)
Size 45 - Stroke 2 - Bold
Click Foreground and change to #f3c3cf
Click Background and Change to #5c3c2a
Type Your Name
Convert Raster To Layer
Plug Ins: Eyecandy 4000 - Gradient Glow
Color: White
Glow Width: 3.00
Soft Corners: 25
Overall Op: 100
Draw Only Outside Selection Checked
Click Ok
Repeat Plug In
Adjust - Sharpen - Sharpen More
All Done
Thank you very much for following my Tutorial
I would love to see your results
and
any feedback
Please Email Me
At
Tutorial Written By ChocUkDesigns
Retained by "Copyright © ChocUkDesigns 2015 All rights Reserved"
RZAA-C0OT-VTUE-HVPU
CT ChocUkDesigns For Michelle's Myths PTU Tutorial For Irish Steampunk Scrap Kit
CT ChocUkDesigns For Michelle's Myths
PTU Tutorial For Irish Steampunk Scrap Kit


DO NOT COPY AND SHARE
PLEASE DIRECT PEOPLE TO MY BLOG
DO NOT CLAIM AS YOUR OWN
Supplies Need:-
Scrap Kit Used: Michelle's Myth's - Irish Steampunk
Which You Can Also Purchase At
Michelle's Myths Store
Or
Smiley Creations Shop
Tube: Tube Of Choice
I Have Used: Chris Pastel's - Marianne
You Can Purchase At PicsForDesign
Please Note You Need A License To Use This Tube
Plug Ins - EyeCandy 4000 - Gradient Glow
Font Of Choice
A Working knowledge Of PSP
Lets Begin With My Tutorial
Open PSP and your Tubes
Open a New 700 x 700 Resolution 200
Use The Following Drop Shadow Unless Stated
V&H: 1 OP: 100 Blur: 2 Color: Black
Repeat V&H: -1
Open & Copy Frame (8)
Paste As New Layer & Resize By 95%
Move Slightly Over To The Right Of Canvas
Open & Copy Paper (4)
Paste As New Layer & Resize By 55%
Move To Inside Frame
Layers - Arrange - Move Down
Activate Frame Layer & Magic Wand
Click Inside Frame
Selections - Modify - Expand By 10, Invent
Select Paper Layer & Hit Delete On Your Board
Open & Copy The Following Elements:-
80 - Resize By 75% - Mirror - Flip
14
Layers - Duplicate - Mirror
22 - Resize By 50%
20 - Resize By 85%, Free Rotate Left By 22 Degrees
29 - Resize By 50%
Activate Top Layer
Activate Your Tube & Copy As Merged
Paste As New Layer & Resize By 45%
Move To Left Handside Of Canvas
Open & Copy The Following Elements:-
18 - Resize By 50%
32 - Resize By 45%
41 - Resize By 50%
34 - Resize By 45%
70 - Resize By 25%
9 - Resize By 30% - Mirror
76 - Resize By 30% - Free Rotate Left By 22 Degrees
45 - Resize By 30%
25 - Resize By 20%
23 - Resize By 85%
90 - Resize By 50%
Layers - Arrange - Send Down To Bottom
Layers - Duplicate x2
Arrange On Both Left & Right Side Of Canvas
Make Sure Top Cluster Is Activated
Layer - Merge - Merge Down x2
Layers - Duplicate x2
Move To Middle Of Canvas
Move To Bottom Of Canvas
1
Layers - Arrange - Send To Bottom
Layers - Merge - Merge Down
Layers - Duplicate - Flip
Activate Your Top Layer
Layers New Raster Layer - Add All Copyright Info
Layers New Raster Layer - Add Watermark
Activate Your Preset Tool and select Eclipse
Draw a Circle once happy with size place near the top left hand corner of Frame (8)
Layers New Raster Layer
Select Your Text Tool
Make Sure The A Goes on a slant and click on your circle you just drew
Select Your Font I have used IncisedBlackWide- Size 60 - Stroke 2 - Bold
Click Foreground and change to #006834
Click Background and Change to #00b758
Type Your Name
Convert Raster To Layer
Plug Ins: Eyecandy 4000 - Gradient Glow
Color: #00e46c
Glow Width: 5.00
Soft Corners: 25
Overall Op: 100
Draw Only Outside Selection Checked
Click Ok
Adjust - Sharpen - Sharpen More
Delete your Preset Shape Layer
Move Your Name Down So Its Sitting Just
Above Inner Part Of Frame
All Done
Thank you very much for following my Tutorial
I would love to see your results
and
any feedback
Please Email Me
At
Dont Forget To Check-Out Michelle's Blog
Tutorial Written By ChocUkDesigns
Retained by "Copyright © ChocUkDesigns 2015 All rights Reserved"
V5LE-35ZP-OBVV-YLZD
Monday 16 February 2015
CT ChocUkDesigns For Heather's Devine Dezigns PTU Tutorial For Luck Of The Irish Scrap Kit
CT ChocUkDesigns For Heather's Devine Dezigns
PTU Tutorial For Luck Of The Irish Scrap Kit


DO NOT COPY AND SHARE
PLEASE DIRECT PEOPLE TO MY BLOG
DO NOT CLAIM AS YOUR OWN
Supplies Need:-
Scrap Kit Used: HDD's - Luck Of The Irish
Which You Can Also Purchase At
PicsForDesigns:-
or
Mystical Scraps
Tube: Spazz's Kate
Please Note You Need A License To Use This Tube
You Can Purchase Her At Her Store
Spazz'd Art
Please Note You Need A License To Use This Tube
Please See TOU
Mask: Mask 47 MB & SW
Which You Can Download
Plug Ins: Eyecandy 4000 - Gradient Glow
Font Of Choice
A Working knowledge Of PSP
Lets Begin With My Tutorial
Open PSP and Your Tube
Open a New 700 x 700 Resolution 200
Use The Following Drop Shadow Unless Stated
V&H: 1 OP: 80 Blur: 2 Color: Black
Repeat With V&H:-1
Open & Copy The Following Elements:-
el 61 - NO DS NEEDED
el 54 - Resize By 50%
el 70 - Free Rotate Left By 22 Degrees
el 74 - Move Up Slightly
el 56 - Resize By 85%
Layers - Duplicate - Mirror
el 29 - Resize By 85%
el 5
el 28 - Resize By 50%, Free Rotate Right By 50 Degrees
Layers - Duplicate - Mirror
el 19 - Resize By 50%
el 1
el 39
el 23 - Free Rotate Right By 22 Degrees - Mirror
el 44 - Resize By 85%
el 46 - Mirror
el 16 - Resize By 45%, Free Rotate Left By 22 Degrees
el 59 - Resize By 20%
el 53 - Resize By 50%
el 18 - Resize By 50%
el 31 - Resize By 20% & Free Rotate Left By 22 Degrees
el 22 - Resize By 20%
Activate Tube & Copy
Paste As New Raster Layer & Resize By 25%
Move To Make It Look Like Shes Laying On The Elements
At Bottom Of Canvas (See Mine For Placement)
Open Paper pp 2
Layers - Promote Background Layer To Raster - New Mask Layer From Image
Select Mask - Mask 47 MB & SW
Make sure Source Luminance is checked only
Copy Merged and Paste as new layer
Resize By 80%
Layers - Arrange - Send To Bottom
Adjust - Blur - Gaussian Blur - 3
Adjust - Add/Remove Noise - Add Noise - Uniform 39% Monochrome Checked
Paste Mask Again
Layers - Arrange - Move Down
Activate Top Layer
Layers New Raster Layer - Add All Copyright Info
Layers New Raster Layer - Add Watermark
Layers New Raster Layer
Select Your Text Tool
Select Your Font I have used IrishUncialfabeta-Bold
- Size 72 (resize To Preferred) - Stroke 2 - Bold
Click Foreground and change to #e7bd41
Click Background and Change to #368c32
Type Your Name
Convert Raster To Layer
Layers - Duplicate
Activate Bottom Layer Of Text
Plug Ins: Eyecandy 4000 - Gradient Glow
Color: #69ec8e
Glow Width: 10.00
Soft Corners: 25
Overall Op: 100
Draw Only Outside Selection Checked
Click Ok
Adjust - Add/Remove Noise - Add Noise - Gaussian 40%
Monochrome Checked
Activate Top Layer Of Text
Adjust - Sharpen - Sharpen More
All Done
Thank you very much for following my Tutorial
I would love to see your results
and
any feedback
Please Email Me
At
Dont Forget To Check-Out Heather's Blog
Tutorial Written By ChocUkDesigns
Retained by "Copyright © ChocUkDesigns 2015 All rights Reserved"
LEOF-PEZV-VJRZ-I5CL
Subscribe to:
Posts
(Atom)
Copyrighted

My Stores


My CT


Who I CT For


Who I Guest CT For

CTs I Manage
CU License


