Grab 1 OF My Blinkies


My Logo

My Licenses


ChocUkDesigns On Facebook


Thursday 30 April 2015
CT ChocUkDesigns For Michelle's Myths/Michelle's Myths Dolls PTU Tutorial For Lydia Doll & Apollymi (A Dark Hunter Kit) Scrap Kit
CT ChocUkDesigns For Michelle's Myths/Michelle's Myths Dolls
PTU Tutorial For Lydia Doll & Apollymi (A Dark Hunter Kit) Scrap Kit


DO NOT COPY AND SHARE
PLEASE DIRECT PEOPLE TO MY BLOG
DO NOT CLAIM AS YOUR OWN
Supplies Need:-
Scrap Kit Used: Michelle's Myth's - Apollymi (A Dark Hunter Kit)
Which You Can Also Purchase At
Michelle's Myths Store
Or
Smiley Creations Shop
Poser: Michelle's Myths Dolls - Lydia
You Can Purchase This Doll Only At
PicsForDesign
Mask: Creative Misfits Creations - Splatter Mask By Sue
Which You Download From Their Blog
Plug Ins: EyeCandy 4000 - Gradient Glow
Font Of Choice
A Working knowledge Of PSP
Lets Begin With My Tutorial
Open PSP and your Tubes
Open a New 800 x 800 Resolution 200
Use The Following Drop Shadow Unless Stated
V&H: 1 OP: 50 Blur: 2 Color: Black
Repeat V&H: -1
Open & Copy Frame (4)
Paste As New Layer & Resize By 85%
Move Slightly Down On Your Canvas
Activate Half Version Of Your Doll & Copy
Paste As New Layer & Resize By 60%
Move To Inside Frame
Activate Eraser Tool & Erase The Parts Hanging Out Of The Bottom Of The Frame
Also Erase Apart OF Your Dolls Hand So It Looks Like Shes Holdin The Feather
Open & Copy Paper 2
Paste As NEw Rastor Layer & Resize By 50%
Move To Inside Frame
Layers - Arrange - Send To The Bottom
Activate Frame Layer & Magic Wand Tool
Click Outside Of Frame
Selections - Invent - Modify - Contract By 11 - Invent
Activate Paper Layer & Hit Delete On Your Keyboard
Selections None
Activate Frame Layer
Open & Copy The Following Elements:-
1 - Resize by 75%
63 - Resize By 40%
Activate Top Layer
29 - Resize by 50%
25 - Resize By 30%
61 - Resize By 30%
26 - Resize By 40% - Free Rotate Left By 90 Degrees
42
3 - Resize By 75%
44 - Resize By 30%
59 - Resize by 80%
33 - Resize By 80%
35 - Resize By 25% - Mirror
40 - Free Rotate Right By 90 Degrees
Layers - Arrange - Send To The Bottom
4 - Free rotate Right By 22 Degrees
10 - Resize By 65% - NO DS NEEDED
Layers - Duplicate - Mirror
8 - Resize By 50%
73 - Resize By 65%
9 - Resize By 65% - NO DS NEEDED
Layers - Dupliccate - Mirror
37 - Resize By 65%
67 - Resize By 65%
71 - Resize By 80%
52 - Resize By 80% - Free Rotate Right By 60 Degrees
82
28 - Mirror
2 - Resize By 80%
67 - Resize By 50%
Erase The Part Sticking Out Of Frame By The Roses
46
Erase The Part Of The Frame Going Across The Heart Only
Open & Copy Paper 2
Paste As New Layer & Resize By 50%
Layers - Arrange - Send To Bottom
Open Paper (6)
Layers - Promote Background Layer To Raster - New Mask Layer From Image
Select Mask - Creative Misfits Creations - Splatter Mask By Sue
Make sure Source Luminance is checked only
Copy Merged and Paste as new layer
Layers - Arrange - Send To Bottom
Resize by 110%
Activate Your Top Layer
Layers New Raster Layer - Add All Copyright Info
Layers New Raster Layer - Add Watermark
Layers New Raster Layer
Select Your Text Tool
Select Your Font I have used Twilight Ozone - Size 72 - Stroke 2 - Bold
Click Foreground and change to White
Click Background and Change to Black
Type Your Name
Convert Raster To Layer
Plug Ins: Eyecandy 4000 - Gradient Glow
Color: #777777
Glow Width: 5.00
Soft Corners: 25
Overall Op: 100
Draw Only Outside Selection Checked
Click Ok
Adjust - Sharpen - Sharpen More
Click Ok
Repeat Plug In
All Done
Thank you very much for following my Tutorial
I would love to see your results
and
any feedback
Please Email Me
At
Dont Forget To Check-Out Michelle's Blog
Tutorial Written By ChocUkDesigns
Retained by "Copyright © ChocUkDesigns 2015 All rights Reserved"
TDC5-78WH-MRV6-RY0J
Saturday 25 April 2015
ChocUkDesigns & Dezignz By Vi Are Having A CT & Ads Call
ChocUkDesigns & Dezignz By Vi Are Having A CT & Ads Call
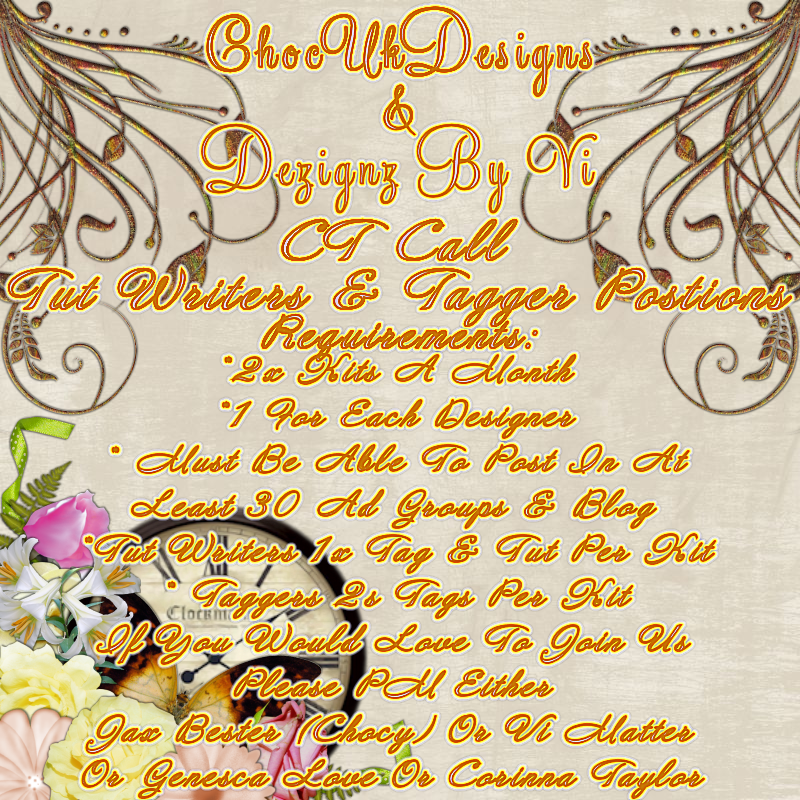
You Can Check-Out Our Kits At The Following Stores:-
ChocUkDesigns
PicsForDesign
Smiley Creations Shop
&
Lollipop n Gumdrops
Dezignz By Vi
PicsForDesign

Friday 24 April 2015
CT ChocUkDesigns For Michelle's Myths PTU Tutorial For Blessed Ostara Scrap Kit
CT ChocUkDesigns For Michelle's Myths
PTU Tutorial For Blessed Ostara Scrap Kit


DO NOT COPY AND SHARE
PLEASE DIRECT PEOPLE TO MY BLOG
DO NOT CLAIM AS YOUR OWN
Supplies Need:-
Scrap Kit Used: Michelle's Myth's - Blessed Ostara
Which You Can Also Purchase At
PicsForDesign
Or
Smiley Creations Shop
Or
Michelle's Myths Store
Tube: Tube Of Choice
I Have Used: An Exclusive Tube By Katharine - Spring
Which You Can Download By Purchasing an Exclusive Membership
At PicsForDesign
Please Note You Need A License To Use This Tube
Mask - WSL_Mask84
Which You Can Download From Her Blog
Plug Ins: EyeCandy 4000 - Gradient Glow
Font Of Choice
A Working knowledge Of PSP
Lets Begin With My Tutorial
Open PSP and your Tubes
Open a New 800 x 800 Resolution 200
Use The Following Drop Shadow Unless Stated
V&H: 1 OP: 50 Blur: 2 Color: Black
Repeat V&H: -1
Activate Tube & Copy
Paste As New Layer & Resize By 45%
Open & Copy The Following Elements:-
39
Layers - Arrange - Move Down
Layers - Duplicate - Mirror
24 - Free Rotate Left By 22 Degrees
Layers - Duplicate - Mirror
22 - Resize By 60%
66 - Resize By 70%
52 - NO DS NEEDED
Layers - Duplicate - Mirror
Frame 4 - Resize By 60%
20 - Resize By 60% - Mirror
31 - Mirror
68 - Resize By 60% - Mirror
33
21 - Resize By 40%
42 - Resize by 50%
41 - Resize By 50%
45 - Resize By 60%
46 - Resize By 60%
Activate Top Layer
14 - Resize By 50% - Mirror
27 - Resize By 70% - Free Rotate Right By 70 Degrees
Activate Eraser Tool & Erase Parts Of The Basket To Make The Flowers
Look Like They Are Laying In The Basket
10 - Resize By 70%
Open Paper 8
Layers - Promote Background Layer To Raster - New Mask Layer From Image
Select Mask - WSL_Mask84
Make sure Source Luminance is checked only
Copy Merged and Paste as new layer
Layers - Arrange - Send To Bottom
Resize By 115%
Open & Copy Paper 3
Paste As New Layer & Resize By 60%
Make Sure Paper Is Inside Frame
Activate Eraser Tool & Erase The Parts Hanging Out Of Frame
Layers - Properties - Op: 80%
Adjust - Soften - Soften More
Activate Your Top Layer
Layers New Raster Layer - Add All Copyright Info
Layers New Raster Layer - Add Watermark
Layers New Raster Layer
Select Your Text Tool
Select Your Font I have used Leaf - Size 72 - Stroke 2 - Bold
Click Foreground and change to #b38c5d
Click Background and Change to #96be18
Type Your Name
Convert Raster To Layer
Plug Ins: Eyecandy 4000 - Gradient Glow
Color: #ffdf34
Glow Width: 5.00
Soft Corners: 25
Overall Op: 100
Draw Only Outside Selection Checked
Click Ok
All Done
Thank you very much for following my Tutorial
I would love to see your results
and
any feedback
Please Email Me
At
Dont Forget To Check-Out Michelle's Blog
Tutorial Written By ChocUkDesigns
Retained by "Copyright © ChocUkDesigns 2015 All rights Reserved"
KLIR-19ZL-KXO3-QJFC
Wednesday 22 April 2015
CT ChocUkDesigns For Heather's Devine Dezigns PTU Tutorial For Strawberry Picnic Scrap Kit
CT ChocUkDesigns For Heather's Devine Dezigns
PTU Tutorial For Strawberry Picnic Scrap Kit


DO NOT COPY AND SHARE
PLEASE DIRECT PEOPLE TO MY BLOG
DO NOT CLAIM AS YOUR OWN
Supplies Need:-
Scrap Kit Used: HDD's - Strawberry Picnic
Which You Can Also Purchase At
PicsForDesigns:-
or
Mystical Scraps
Tube:An Excluive Tube By Eugine Rzhevskii - July Gift
Please Note You Need A License To Use This Tube
You Can Download Her By Buying
An Exclusive Club Membership
At PicsForDesign
Mask: WSL_Mask84
Which You Can Download
Plug Ins: Xero - Porcelain
Xero - Radiance
Eyecandy 4000 - Gradient Glow
Font Of Choice
A Working knowledge Of PSP
Lets Begin With My Tutorial
Open PSP and Your Tube
Open a New 700 x 700 Resolution 200
Use The Following Drop Shadow Unless Stated
V&H: 1 OP: 60 Blur: 2 Color: Black
Repeat With V&H:-1
Activate Tube & Paste As New Layer
Resize by 38% & Move To Center Of Canvas For Now
Open & Copy The Following Elements:-
102 - Resize By 85%
Layers - Arrange - Move Down
Layers - Duplicate - Mirror
100 - Resize By 85%
Open & Copy Paper 15
Paste As New Layer & Resize By 60%
Layers - Arrange - Move Down
Place Inside Element 100
Open & Copy Paper 18
Paste As New Layer & Resize By 50%
Layers - Arrange - Move Down
Place Inside Copy Of Element 102
Copy & Paste Paper 15 Again
This Resize By 40%
Layers - Arrange - Move Down
Place Inside Element 102
Activate Tube Again & Free Hand Selection Tool
Draw Around Part Of Tube
I Have Chosen Her Waist & Chest & Copy As Merged
Paste As New Layer & Place Into The Bottom Frame
Repeat For Other 2x Frames But Using Different Parts
I Used Her Face & Her Leg With Her Tattoo
Once Completed Activate Top Frame Layer & Magic Wand Tool
Click Inside Frame
Selections - Modify - Expand By 24 , Invent
Activate Tube Layer & Hit Delete On Your Keyboard
KEEP SELECTED & Repeat For Paper Layer
Selections, None
Activate Tube Layer
Plug In: Xero - Porcelain
Softness:50
Strength: 128
Brightness: 128
Red Channel: 0
Green Channel: 0
Blue Channel: 255
Click Ok
Xero - Radiance
Strangeness: 32
Charm: 106
Truth: 128
Beauty: 255
Click Ok
Adjust - Sharpen - Sharpen Mire
Layers - Prperties
Blend Mode: Luminance (Legacy)
Click OK
Repeat All The Above For The Other 2x Frames
Activate Top Frame Layer
Open & Copy The Following Elements:-
91 - Resize By 70%, Mirror - Flip
60 - Resize By 40%
89 - Resize By 40% - Mirror
61 - Resize By 50%
58 - Resize by 50%
39 - Resize By 50%
62 - Resize by 50%
67 - Resize By 85%
8 - Resize by 50% - Free Rotate Right By 90 Degrees
72 - Resize By 50%
75 - Resize by 75%, Mirror & Free Rotate Left By 22 Degrees
41 - Resize By 40%
Layers - Duplicate - Mirror
2 -- Resize By 50% - Mirror
1 - Resize By 40%
55 - Resize By 50%
97 - Resize by 50%
96 - Resize By 40% - Mirror
13 - Resize By 30% - Mirror
42 - Resize By 40%
71 - Free Rotate Right By 11 Degrees
50 - Resize by 70% - Free Rotate Left By 11 Degrees
43 - Resize By 40% - Flip - Mirror
76 - Resize By 70%
45 - Resize By 40%
94 - Resize By 50% - NO DS NEEDED
Layers - Arrange - Send To Bottom
Layers - Duplicate - Mirror
Layers - Merge - Merge Down
Layers - Duplicate - Fip
Open & Copy Paper 19
Layers - Promote Background Layer To Raster - New Mask Layer From Image
Select Mask - WSL_Mask84
Make sure Source Luminance is checked only
Copy Merged and Paste as new layer
Layers - Arrange - Send To Bottom
Resize By 97% - Mirror
Activate Top Layer
Layers New Raster Layer - Add All Copyright Info
Layers New Raster Layer - Add Watermark
Layers New Raster Layer
Select Your Text Tool
Select Your Font I have used Good Vibraitions -Bold
- Size 72 (resize To Preferred) - Stroke 2 - Bold
Click Foreground and change to White
Click Background and Change to #ed2426
Type Your Name
Convert Raster To Layer
Plug Ins: Eyecandy 4000 - Gradient Glow
Color: #990000
Glow Width: 5.00
Soft Corners: 25
Overall Op: 100
Draw Only Outside Selection Checked
Click Ok
All Done
Thank you very much for following my Tutorial
I would love to see your results
and
any feedback
Please Email Me
At
Chocuk22@yahoo.com
Dont Forget To Check-Out Heather's Blog
http://heathersdevinedezigns.blogspot.com/
Tutorial Written By ChocUkDesigns
Retained by "Copyright © ChocUkDesigns 2015 All rights Reserved"
BG9K-ULOJ-EFMF-1YWT
UPDATE TO CURRENT TOUS
UPDATE TO CURRENT TOUS
EFFECTIVE IMMEDIATELY
TO ALL FUTURE & PAST CREATIONS
You are NOT ALLOWED to use any items in my kits, or the whole kit in general, in any way with which profit may be gained..
*** Example: Making tags or timeline sets for people for monetary gain ***
This means you can use my kits to make tags or timeline/forum sets for free or for your own personal use, but can NOT use my kits or items from my kits
to make things for other people with which you charge any kind of fee in any way, whether it be by monetary gain or by offering up a trade or a service.
** Thank you for your continued support **
CT ChocUkDesigns For Irish Princess Designs PTU Tutorial For Eventide Scrap Kit
CT ChocUkDesigns For Irish Princess Designs
PTU Tutorial For Eventide Scrap Kit


DO NOT COPY AND SHARE
PLEASE DIRECT PEOPLE TO MY BLOG
DO NOT CLAIM AS YOUR OWN
Supplies Need:-
Scrap Kit Used: IPD's - Eventide Kit
Which You Can Also Purchase At
The PSP Project:-
Or
Scrapping Your Memories
Or
Smiley Creations Shop
Tube: An Exclusive Tube By Orkusart's - Fairy
Please Note You Need A License To Use This Tube
You Can Download This Tube
By Purchasing An Exclusive Membership
At PicsForDesign
Mask: Vix_Mask363
Which You Download From Her Blog
Plug Ins: EyeCandy 4000 - Gradient Glow
Font Of Choice
A Working knowledge Of PSP
Lets Begin With My Tutorial
Open PSP and Your Tube
Open a New 780 x 790 Resolution 200
Using The Following Drop Shadow UNLESS STATED:-
V&H: 1 OP: 60 Blur: 10 Color: Black
Repeat With V&H: -1
Open & Copy The Following Elements:-
75 - Resize By 30% - NO DS NEEDED
24 - Resize By 25% - Mirror
49 - Resize by 30%
33 - Resize By 85%
Activate Tube & Copy
Paste As New Layer & Resize By 75%
Open & Copy The Following Elements:-
1 - Resize By 50% - Mirror
23 - Resize By 30%
14 - Resize By 30%
99 - Resize By 50% - Mirror - NO DS NEEDED
55 - Resize By 50%
50 - Resize By 35%
71 - Resize By 50%
18 - Resize By 50% - Mirror
95 - Resize by 30% - Mirror
93 - Resize By 30% - Mirror
38 - Resize by 50%
59 - Resize By 30%
28 - Resize By 20%
12 - Resize by 50%
79 - Resize By 40% - NO DS NEEDED
22 - Resize By 30%
47 - Resize by 20%
15 - Resize By 20%
8 - Resize By 30%
4 - Resize By 30%
83 - Resize By 50%
36 - Resize By 50%
2 - Resize By 50%
54 - Resize By 20%
3 - Resize By 30% - Mirror
13 - Resize By 30% - Free Rotate Right By 22 Degrees
41 - Resize by 30%
44 - Resize by 20% - NO DS NEEDED
Open Paper 9
Layers - Promote Background Layer To Raster - New Mask Layer From Image
Select Mask - Vix_Mask363
Make sure Source Luminance is checked only
Copy Merged and Paste as new layer
Layers - Arrange - Send To Bottom
Resize By 80%
Activate Top Layer
Layers New Raster Layer - Add All Copyright Info
Layers New Raster Layer - Add Watermark
Layers New Raster Layer
Select Your Text Tool
Select Your Font I have used
Moonstar - Size 72 (resize To Preferred) - Stroke 2 - Bold
Click Foreground and change to #24e4f4
Click Background and Change to #8e42f1
Type Your Name
Convert Raster To Layer
Plug Ins: Eyecandy 4000 - Gradient Glow
Color: #e693fe
Glow Width: 5.00
Soft Corners: 25
Overall Op: 100
Draw Only Outside Selection Checked
Click Ok
Repeat Plug In
All Done
Thank you very much for following my Tutorial
I would love to see your results
and
any feedback
Please Email Me
At
Dont Forget To Check-Out IPD's Blog
Tutorial Written By ChocUkDesigns
Retained by "Copyright © ChocUkDesigns 2015 All rights Reserved"
ZHEO-SOBG-HDKV-IGUZ
Tuesday 21 April 2015
CT ChocUkDesigns For Rissa's Designs PTU Tutorial For Flowers For Mama Scrap Kit
CT ChocUkDesigns For Rissa's Designs
PTU Tutorial For Flowers For Mama
Scrap Kit


DO NOT COPY AND SHARE
PLEASE DIRECT PEOPLE TO MY BLOG
DO NOT CLAIM AS YOUR OWN
Supplies Need:-
Scrap Kit Used: Rissa's Designs - Flowers For Mama Kit
Which You Can Also Purchase At :-
Smiley Creations Shop
&
Scrapping Your Memories
Tube: Of Choice
I Have Used An Exclusive Tube By Trinita - Marta
You Can Purchase This Tube At PicsForDesigns
By Purchasing An Exclusive Club Membership
Plug Ins: Xero - Softmood
EyeCandy 4000 - Gradient Glow
Mask: WSL_Mask226
You Can Download From Her Blog
Font Of Choice
A Working knowledge Of PSP
Lets Begin With My Tutorial
Open PSP and Your Tube
Open a New 700 x 700 Resolution 200
Using The Following Drop Shadow UNLESS STATED:-
V&H: 1 OP: 60 Blur: 5 Color: Black
Repeat With V&H: -1
Open & Copy Element 31
Paste As New Layer & Free Rotate Left By 90 Degrees - Mirror
Activate Tube & Free Hand Selection Tool
Draw Round The Top Half Of The Tube & Copy As Merged
Paste As New Layer & Resize By 90% - Mirror
Layers - Arrange - Move Down
Place Inside Frame
Open & Copy Paper 6
Paste As New Layer & Resize By 55%
Place Inside Frame & Layers - Arrange - Move Down
Activate Top Layer & Magic Wand Tool
Click Inside Frame
Selections - Modify - Expand By 20, Invent
Keep Selected
Activate Tune Layer & Hot Delete On Your Keyboard
KEEP SELECTED
Repeat For Paper Layer
Selections - None
Activate Tube Layer
Plug Ins: Xero - Softmood
Haziness: 50
Glow - Red:50
Lock Sliders Checked
Brightness:0
Contrast: 0
Click Ok
Layers - Properties - Op: 70%
Adjest - Soften - Soften More
Activate Frame Layer Again
Open & Copy The Following Elements:-
63 - Resize By 40% - Mirror
66 - Resize By 40%
96 - Resize By 45% - Mirror
45 - Resize By 20% - Free Rotate Right By 22 Degrees
39 - Resize By 20%
87 - Resize By 40%
62 - Resize By 20%
92 - Resize By 30%
94 - Resize By 40%, Free Rotate Left By 22 Degrees
88 - Resize By 30% - Mirror
82 - Resize by 30%
86 - Resize By 50%
7 - Resize By 30% - Mirror
44 - Resize By 30% - Mirror - Flip
97 - Resize By 50%
43 - Resize By 50% - Free Rotate Left By 90 Degrees
46 - Resize By 30%
8 - Resize By 50%
90 - Resize By 50%, Flip
91 - Resize By 50%
81 - Resize By 35%
60 - NO DS NEEDED
53 - Resize By 20%
Layers - Duplicate - Mirror
37 - Resize By 50%
Layers - Arrange - Send To Bottom
10 - Resize By 30%
36 - Resize By 30% - Free Rotate Right By 22 Degrees
Activate Top Layer
Activate Tube & Copy As Merged Full Version
Paste As New Layer & Resize By 45%
Open Paper 10
Layers - Promote Background Layer To Raster - New Mask Layer From Image
Select Mask - WSL_Mask226
Make sure Source Luminance is checked only
Copy Merged and Paste as new layer
Layers - Arrange - Send To Bottom
Resize By 80%
Activate Top Layer
Layers New Raster Layer - Add All Copyright Info
Layers New Raster Layer - Add Watermark
Layers New Raster Layer
Select Your Text Tool
Select Your Font I have used
Invatation Script - Size 72 (resize To Preferred) - Stroke 2 - Bold
Click Foreground and change to #f1658f
Click Background and Change to #f8d1d4
Type Your Name
Convert Raster To Layer
Plug Ins: Eyecandy 4000 - Gradient Glow
Color: #f8d1d4
Glow Width: 5.00
Soft Corners: 25
Overall Op: 100
Draw Only Outside Selection Checked
Click Ok
Adjust - Sharpen - Sharpen More
Repeat Plug In
Click Ok
All Done
Thank you very much for following my Tutorial
I would love to see your results
and
any feedback
Please Email Me
At
Dont Forget To Check-Out Rissa's Blog
Tutorial Written By ChocUkDesigns
Retained by "Copyright © ChocUkDesigns 2015 All rights Reserved"
2YEC-4MWT-4MJF-XT1I
CT ChocUkDesigns For FwTags Creations PTU Tutorial For Wild Beauty Scrap Kit
CT ChocUkDesigns For FwTags Creations
PTU Tutorial
For Wild Beauty Scrap Kit


DO NOT COPY AND SHARE
PLEASE DIRECT PEOPLE TO MY BLOG
DO NOT CLAIM AS YOUR OWN
Supplies Need:-
FwTags Creations - Wild Beauty Scrap Kit
You Can Purchase this Beautiful Kit At:-
Berry Applicious
&
Sensibility Scrapping
&
Digifox Studios
&
Scraps n Company
&
Mischief Designz
Tube: Of Choice
I Have Used An Exclusive Tube By Katharine - Desert Rose
You Can Purchase This Tube At PicsForDesigns
By Purchasing An Exclusive Club Membership
Please Note You Need A License To Use This Tube
Mask: Select Vix_Mask404
Which You Download From Her Blog
Plug Ins: Alien Skin Eye Candy 5: Nature - Ripples
Eyecandy 4000 - Gradient Glow
A Working knowledge Of PSP
Lets Begin With My Tutorial
Open PSP and your Tube and Mask.
Open a New 700 x 700 Resolution 200
Add The Following Drop Shadow Unless Stated:-
V&H: 1, OP: 60, Blur: 2 Color: Black
Repeat With V&H: -1
Open & Copy The Following Elements:-
59 - Resize By 40%
Layers - Duplicate - Mirror
Layers - Duplicate - Flip
Layers - Duplicate - Mirror
26 - Resize by 50%
37 - Resize By 50%
Layers - Duplciate - Mirror
15 - Resize By 40% - Free Rotate Right By 70 Degrees - Flip
4 - Resize By 20%
Layers - Duplicate
Layers - Duplicate - Mirror
Layers - Duplicate
44 - Resize by 20%
24 - Resize By 80%
1 - Resize By 50%
59 - Resize By 50%
Layers - Duplicate - Mirror
12 - Resize By 30% - Free Rotate Right By 90 Degrees
30 - Resize By 10%
52 - Resize by 5%
Layers - Duplicate - Mirror
22 - Resize by 5, Free Rotate Left By 50 Degrees
73 - Resize By 30%
15 - Resize By 30%
Layers - Duplicate - Flip
Layer - Mirror
Layers - Duplicate - Flip
Layers - Arrange - Move Down x2
Layers - Merge - Merge Down
Layers - Duplicate
60 - Resize By 50%
Layers - Arrange - Move Down
32 - Resize By 30% - Mirror
Activate Eraser Tool & Erase A Little Of The Branch On The End
To Look Like Its Coming From Behind Element 15
10 - Resize by 40%
45 - Resize by 40% - Mirror
23 - Resize By 20%
18 - Resize By 20%
68 - Resize by 15%
Layers - Duplicate - Mirror
Layers - Merge - Merge Down
Layers - Duplicate
Layers - Merge - Merge Down
Layers - Duplicate - Mirror
53 - Resize by 25%
28 - Resize By 10%
21 - Resize By 10%
Layers - Duplicate
Layers - Duplicate - Mirror
Layers - Duplicate
Open & Copy Tube
Paste As New Layer & Resize By 35%
Layers - Duplicate - Flip
Layers - Arrange - Move Down
Move Tube To Look Like A Reflection
Activate Eraser Tool & Erase The Parts OF The That
Are Over Lapping The Water From Element 24
Once Happy
Plug In: Alien Skin Eye Candy 5: Nature - Ripples
Please Use These Settings:-
Basic Settings:-
Rain Drops
Number Of Raindrops: 5
Ripple Wavelength (Pixels): 32.11
Time: 1.00
Random Wave Amplitude: 40
Random Wave Wavelength: 1.79
Refraction: 24
Draw Outside Unchecked
Random Seed 1
Click Ok
Repeat Plug In
Layers - Properties - Op: 85%
Click Ok
Open Paper 1
Layers - New Mask Layer - From Image - Select Vix_Mask404
Make Sure Source Luminance Is Check and Invert Mask Data Is not checked
Copy Merged and Paste as new raster on working image
Resize By 97%
Layers Arrange Send To Bottom
Activate Top Layer
Layers New Raster Layer - Add All Copyright Info or Credits
Layers New Raster Layer - Add Watermark
Select Font African, Size 48 Stroke 2 and Bold
Foreground Color - #443623
Background Color - Switch Plor Palette To Pattern
Select An Animal Print I Have Used Leopard
Use These Settings:-
Angle:0
Sclae:100
Type Your Name
Place on Tag where Desired
Convert Layer to Raster
Plug Ins: Eyecandy 4000 - Gradient Glow
Color: #c48763
Glow Width: 5.00
Soft Corners: 25
Overall Op: 100
Draw Only Outside Selection Checked
Click Ok
Adjust - Sharpen - Sharpen More
Save as Png and Name Your Tag
All Done!!!
Thank you very much for following my Tutorial
I would love to see your results
and
any feedback
Please Email Me
At
Dont Forget To Check-Out FwTags' Blog
Tutorial Written By ChocUkDesigns
Retained by "Copyright © ChocUkDesigns 2015 All rights Reserved"
GWCZ-NFGT-ARSL-YKFU
Sunday 19 April 2015
CT ChocUkDesigns For Dezignz By Vi PTU Tutorial For Partytime Somewhere Scrap Kit
CT ChocUkDesigns For Dezignz By Vi
PTU Tutorial For Partytime Somewhere Scrap Kit


DO NOT COPY AND SHARE
PLEASE DIRECT PEOPLE TO MY BLOG
DO NOT CLAIM AS YOUR OWN
Supplies Need:-
Scrap Kit Used: Dezignz By Vi's - Partytime Somewhere
Which You Can Also Purchase At
PicsForDesign
Tube: Tube Of Choice
I Have Used: Celinart Pinups' - Ink Me
Which You Can Purchase From Her Store
Please Note You Need A License To Use This Tube
Mask - Creative Misfits - Splatter Mask By Sue
Which You Can Download From Their Blog
Plug Ins: EyeCandy 4000 - Gradient Glow
Font Of Choice
A Working knowledge Of PSP
Please Note Tutorial Is For Tag Only
Lets Begin With My Tutorial
Open PSP and your Tubes
Open a New 700 x 700 Resolution 200
Use The Following Drop Shadow Unless Stated
V&H: 1 OP: 60 Blur: 5 Color: Black
Repeat V&H: -1
Activate & Copy Your Tube
Paste As New Layer & resize By 65%
Open & Copy The Following Elements:-
2 - Resize By 90%
Layers - Arrange - Move Down
15 - Resize By 45% - Free Rotate Right By 33 Degrees
Layers - Duplicate - Mirror
41 - Resize By 50%
Layers - Duplicate - Mirror
31 - Resize By 50%
9 - Resize By 50%
Layers - Duplicate - Mirror
13 - Resize By 30% - Free Rotate Right By 33 Degrees
Layers - Duplicate - Mirror
Layers - Duplicate - Resize By 75%
Layers - Arrange - Move Up
3 - Resize By 50%
Layers - Arrange - Move Down
8 - Resize By 50%
Activate Tube Layer
5 - Resize By 50% - Free Rotate Left By 60%
62 - Resize By 25%
29 - Resize by 25% - Mirror
Open Paper 12
Layers - Promote Background Layer To Raster - New Mask Layer From Image
Select Mask - Creative Misfits - Splatter Mask By Sue
Make sure Source Luminance is checked only
Copy Merged and Paste as new layer
Layers - Arrange - Send To Bottom
Activate Your Top Layer
Layers New Raster Layer - Add All Copyright Info
Layers New Raster Layer - Add Watermark
Layers New Raster Layer
Select Your Text Tool
Select Your Font I have used RapScript - Size 40 - Stroke 2 - Bold
Click Foreground and change to #00fc23
Click Background and Change to Black
Type Your Name
Convert Raster To Layer
Plug Ins: Eyecandy 4000 - Gradient Glow
Color: #66da06
Glow Width: 3.00
Soft Corners: 25
Overall Op: 100
Draw Only Outside Selection Checked
Click Ok
All Done
Thank you very much for following my Tutorial
I would love to see your results
and
any feedback
Please Email Me
At
Dont Forget To Check-Out Vi's Blog
Tutorial Written By ChocUkDesigns
Retained by "Copyright © ChocUkDesigns 2015 All rights Reserved"
IOUK-GUJT-3MUE-763L
Saturday 18 April 2015
ChocUkDesigns Is Having A CT & Ads Call
ChocUkDesigns Is Having A CT & Ads Call

You Can Check-Out My Kits At The Following Stores:-
PicsForDesign
Smiley Creations Shop
&
Lollipop n Gumdrops

TAG SHOW OFF By Missie's Stormy Creations Using My Scrap Kit Carry On My Wayward Son
TAG SHOW OFF
Just Wanted To Show Off These Totally Kick Ass Tags
Made For Me
Made For Me
By Missie's Stormy Creations Using
My New PTU Scrap Kit
Carry On My Wayward Son
My New PTU Scrap Kit
Carry On My Wayward Son


Check-Out Her Awesome Blog As Well!!!!!!
http://missiesstormycreationz.blogspot.com/

http://missiesstormycreationz.blogspot.com/

Carry On My Wayward Son.....
I Am A huge Supernatural Fan & Decided To Dedicate
My 1st Goth Kit To 1 OF My Favourite Tv Shows,
Whether Your A Dean, Sam, Castiel, Crowley or Even A Bobbys Girl
Or Even Not Even A Fan Of The Show But Love Dark Gothic Themed Kits
This Is For You!
P.S. If Your A Fan Of The Show Theres Some
Awesome Elements Including Dean's Baby!!!
Comes With 201x Elements & 21x Papers
Tagger Size
Personal Use Only
Only $2!!!!!!!!
You Can Purchase At All My Stores:-
Digi Divas
http://digidivas.co.uk/shop/index.php?main_page=product_info&cPath=67_206_207&products_id=463
&
You Can Purchase At All My Stores:-
Digi Divas
http://digidivas.co.uk/shop/index.php?main_page=product_info&cPath=67_206_207&products_id=463
&
PicsForDesign
TAG SHOW OFF By CT Marcia Of OnePlus Creations Using My Scrap Kit Carry On My Wayward Son
TAG SHOW OFF
Just Wanted To Show Off These Totally Kick Ass Tags
Made For Me
Made For Me
By Marcia Of OnePlus Creations Using
My New PTU Scrap Kit
Carry On My Wayward Son
My New PTU Scrap Kit
Carry On My Wayward Son


Check-Out Her Awesome Blog As Well!!!!!!
http://onepluscreations.blogspot.com/
Only $2!!!!!!!!
You Can Purchase At All My Stores:-
Digi Divas
http://digidivas.co.uk/shop/index.php?main_page=product_info&cPath=67_206_207&products_id=463
&
http://onepluscreations.blogspot.com/
Carry On My Wayward Son.....
I Am A huge Supernatural Fan & Decided To Dedicate
My 1st Goth Kit To 1 OF My Favourite Tv Shows,
Whether Your A Dean, Sam, Castiel, Crowley or Even A Bobbys Girl
Or Even Not Even A Fan Of The Show But Love Dark Gothic Themed Kits
This Is For You!
P.S. If Your A Fan Of The Show Theres Some
Awesome Elements Including Dean's Baby!!!
Comes With 201x Elements & 21x Papers
Tagger Size
Personal Use Only
I Am A huge Supernatural Fan & Decided To Dedicate
My 1st Goth Kit To 1 OF My Favourite Tv Shows,
Whether Your A Dean, Sam, Castiel, Crowley or Even A Bobbys Girl
Or Even Not Even A Fan Of The Show But Love Dark Gothic Themed Kits
This Is For You!
P.S. If Your A Fan Of The Show Theres Some
Awesome Elements Including Dean's Baby!!!
Comes With 201x Elements & 21x Papers
Tagger Size
Personal Use Only
Only $2!!!!!!!!
You Can Purchase At All My Stores:-
Digi Divas
http://digidivas.co.uk/shop/index.php?main_page=product_info&cPath=67_206_207&products_id=463
&
PicsForDesign
Subscribe to:
Posts
(Atom)
Copyrighted

My Stores


My CT


Who I CT For


Who I Guest CT For

CTs I Manage
CU License


