Grab 1 OF My Blinkies


My Logo

My Licenses


ChocUkDesigns On Facebook


Wednesday 30 September 2015
TAG SHOW OFF By CT La Guerita Designz Using My Digi Divas Exclusive PTU Scrap Kit Autumn Breeze
TAG SHOW OFF
Just Wanted To Show Off These Awesome Tags Made For Me
By La Guerita Designz Using
My DD Exclusive PTU Scrap Kit Autumn Breeze
My DD Exclusive PTU Scrap Kit Autumn Breeze


Check-Out Her Awesome Blog As Well!!!!!!
http://lagueritadesignz.blogspot.com/


A Cute Little Autumn Scrap Kit
Full Of Fall Elements & Colors
Exclusive To Digi Divas
Comes With 70x Elements & 12x Papers
2x Chibis
Tagger Size
1000x1000
Full Of Fall Elements & Colors
Exclusive To Digi Divas
Comes With 70x Elements & 12x Papers
2x Chibis
Tagger Size
1000x1000
Only $1.00!!!!!!!!
You Can Purchase Exclusively At:-
Digi Divas
You Can Purchase Exclusively At:-
Digi Divas
TAG SHOW OFF By CT Simply Different Tags Using My Digi Divas Exclusive Scrap Kit For Autumn Breeze
TAG SHOW OFF
Just Wanted To Show Off This Awesome Timeline Set Made For Me
By Simply Different Tags Using
My DD Exclusive PTU Scrap Kit Autumn Breeze
My DD Exclusive PTU Scrap Kit Autumn Breeze


Check-Out Her Awesome Blog As Well!!!!!!
http://simplydifferenttags.blogspot.com/


She Also Made A Beautiful Set For My Fan Page


She Also Made A Beautiful Set For My Fan Page
A Cute Little Autumn Scrap Kit
Full Of Fall Elements & Colors
Exclusive To Digi Divas
Comes With 70x Elements & 12x Papers
2x Chibis
Tagger Size
1000x1000
Full Of Fall Elements & Colors
Exclusive To Digi Divas
Comes With 70x Elements & 12x Papers
2x Chibis
Tagger Size
1000x1000
Only $1.00!!!!!!!!
You Can Purchase Exclusively At:-
Digi Divas
You Can Purchase Exclusively At:-
Digi Divas
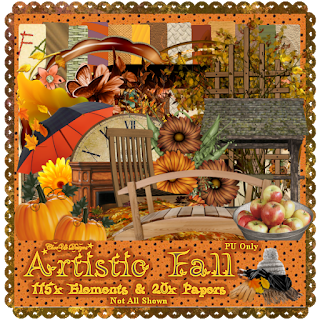
TAG SHOW OFF By CT Simply Different Tags Using My Scrap Kit For Artistic Fall
TAG SHOW OFF
Just Wanted To Show Off This Awesome Timeline Set Made For Me
By Simply Different Tags Using
My PTU Scrap Kit Artistic Fall
My PTU Scrap Kit Artistic Fall


Check-Out Her Awesome Blog As Well!!!!!!


She Also Made A Beautiful Set For My Fan Page
Which She Entered Into My CT Team Contest
& Won
Which She Entered Into My CT Team Contest
& Won

Fall Is Here Which Is 1 Of My Fave Seasons!!!!
Heres A Beautiful Fall Kit To Celebrate This Beautiful Time OF Year
With 115x Elements & 20x Papers
Perfect For All Your Fall/Autumn/Harvest Projects
Tagger Size
Heres A Beautiful Fall Kit To Celebrate This Beautiful Time OF Year
With 115x Elements & 20x Papers
Perfect For All Your Fall/Autumn/Harvest Projects
Tagger Size
Only $1.50!!!!!!!!
You Can Purchase At All My Stores:-
Digi Divas
PicsForDesign
TAG SHOW OFF By CT Ally Cat Tags Using My Digi Divas Exclusive Scrap Kit For Autumn Breeze
TAG SHOW OFF
Just Wanted To Show Off These Awesome Tags Made For Me
By Ally Cat Tags Using
My DD Exclusive PTU Scrap Kit Autumn Breeze


My DD Exclusive PTU Scrap Kit Autumn Breeze


Check-Out Her Awesome Blog As Well!!!!!!
http://allycattags.blogspot.ca/
A Cute Little Autumn Scrap Kit
Full Of Fall Elements & Colors
Exclusive To Digi Divas
Comes With 70x Elements & 12x Papers
2x Chibis
Tagger Size
1000x1000
Full Of Fall Elements & Colors
Exclusive To Digi Divas
Comes With 70x Elements & 12x Papers
2x Chibis
Tagger Size
1000x1000
Only $1.00!!!!!!!!
You Can Purchase Exclusively At:-
Digi Divas
You Can Purchase Exclusively At:-
Digi Divas
TAG SHOW OFF By CT Ally Cat Tags Using My Scrap Kit Artistic Fall
TAG SHOW OFF
Just Wanted To Show Off These Awesome Tags Made For Me
By Ally Cat Tags Using
My New PTU Scrap Kit Artistic Fall


My New PTU Scrap Kit Artistic Fall


Check-Out Her Awesome Blog As Well!!!!!!
http://allycattags.blogspot.ca/
Fall Is Here Which Is 1 Of My Fave Seasons!!!!
Heres A Beautiful Fall Kit To Celebrate This Beautiful Time OF Year
With 115x Elements & 20x Papers
Perfect For All Your Fall/Autumn/Harvest Projects
Tagger Size
Heres A Beautiful Fall Kit To Celebrate This Beautiful Time OF Year
With 115x Elements & 20x Papers
Perfect For All Your Fall/Autumn/Harvest Projects
Tagger Size
Only $1.50!!!!!!!!
You Can Purchase At All My Stores:-
Digi Divas
PicsForDesign
TAG SHOW OFF By CT Ally Cat Tags Using My Scrap Kit In The Summertime
TAG SHOW OFF
Just Wanted To Show Off These Awesome Tags Made For Me
By Ally Cat Tags Using
My New PTU Scrap Kit In The Summertime


My New PTU Scrap Kit In The Summertime


Check-Out Her Awesome Blog As Well!!!!!!
http://allycattags.blogspot.ca/


A Summery & Beachy Scrap Kit To Celebrate The Summer Months
Full Of Summer & Beach Elements including Food & Drinks
136x Elements & 22x Papers
Tagger Size
1000x1000
Full Of Summer & Beach Elements including Food & Drinks
136x Elements & 22x Papers
Tagger Size
1000x1000
Only $1.50!!!!!!!!
You Can Purchase At All My Stores:-
You Can Purchase At All My Stores:-
Digi Divas
PicsForDesign
NEW EXCLUSIVE SCRAP KIT FOR Tony.T - Silvana PTU Scrap Kit
Hi All
Here Is A New Exclusive Scrap Kit For
Tony Tzanoukakis's Silvana Tube

Silvana Is An Exclusive Kit Match For
Tony Tzanoukakis's Silvana Tube

Silvana Is An Exclusive Kit Match For
Tony Tzanoukakis's Silvana Tube

A Cute Little Kit With Sexy & Elegant
With A Hint Of Rock
Elements In Purples, Violet Lilac, Silver & Grey
With A Hint Of Rock
Elements In Purples, Violet Lilac, Silver & Grey
Which You Can Purchase At Tony Tzanoukakis's Store:-
The Art Of Tony Tzanoukakis Store
Tube & Scrap Kit
Tube & Scrap Kit
Scrap Kit
Tuesday 29 September 2015
CT ChocUkDesigns For Michelle's Myths PTU Tutorial For Nasima Scrap Kit
CT ChocUkDesigns For Michelle's Myths
PTU Tutorial For Nasima Scrap Kit


DO NOT COPY AND SHARE
PLEASE DIRECT PEOPLE TO MY BLOG
DO NOT CLAIM AS YOUR OWN
Supplies Need:-
Scrap Kit Used: Michelle's Myth's - Nasima
Which You Can Also Purchase At:-
Inspirations Of ScrapFriends
&
Smiley Creations Shop
Poser: Designs By Norella - Nasima
Which Is A Kit Match
You Can Purchase This Sexy Poser
At Her Store:-
Mask - Mask 42 MB & SW
Which You Can Download From Their Blog
Plug In: Xero - Radiance
EyeCandy 4000 - Gradient Glow
EyeCandy 4000 - Gradient Glow
Font Of Choice
A Working knowledge Of PSP
Lets Begin With My Tutorial
Open PSP and your Poser
Open a New 800 x 800 Resolution 200
Use The Following Drop Shadow Unless Stated
V&H: 1 OP: 60 Blur: 2 Color: Black
Repeat V&H: -1
Open & Copy Element 46 - Mirror
Activate Poser & Copy
Paste As New Layer & Resize by 55%
Open & Copy Paper 7
Paste As New Layer & Resize By 55%
Layers - Arrange - Send Down To The Bottom
Activate Poser & Freehand Selection Tool
Draw Round Head & Shoulders & Copy
Paste As New Layer & Resize By 85%
Move Into Frame
Layers - Duplicate - Mirror
Move Up Slightly In Frame
Layers Merge - Merge Down
Plug In: Xero - Radiance:-
Strangeness: 90
Charm: 30
Truth: 150
Beauty: 188
Click Ok
Adjust - Sharpen - Sharpen More
Layers - Properities:-
Blend Mood: Luminance (Legacey)
Op: 85%
Click Ok
Activate Frame Layer & Magic Wand Tool
Hold Shift & Click Inside Each Frame
Selections - Modify - Expand By 10 - Invent
Activate Tube Layer & Hit Delete On Your Keyboard
KEEP SELECTED
Repeat For Paper Layer
Selections - None
Activate Frame Layer Again
Open & Copy The Following Elements:-
109 - Resize by 75% - Free Rotate Left By 11 Degrees
Layers - Duplicate - Mirror
120
94 - Resize By 55% - Mirror
78 - Resize by 55%
42 - Resize by 85% - Mirror
Activate Eraser Tool
Erase The Top Part Of Cart That Is Covering Horses' Head
74 - Free Rotate Left By 11 Degrees - NO DS
Plug Ins: Eyecandy 4000 - Gradient Glow
Color: White
Glow Width: 3.00
Soft Corners: 25
Overall Op: 100
Draw Only Outside Selection Checked
Click Ok
Adjust - Sharpen - Sharpen More
63 - Resize by 60% - Free Rotate Left By 55 Degrees
Layers - Duplicate - Mirror
Free Rotate Left By 22 Degrees
Activate Tube Layer
41 - Resize By 35%
2 - Resize by 35%
3 - Resize by 55%
101 - Resize By 55% - NO DS
Repeat Plug In From Earlier
71 - Resize By 55%
70 - Resize by 55% - Mirror
Adjust - Sharpen - Sharpen More
39 - Resize by 50% - Flip
14 - Resize By 35%
81 - Resize By 35% - Mirror
61 - Resize By 35%
122 - Resize By 35% - Free Rotate Right By 90 Degrees
64 - Resize by 35% - Flip - Free Rotate Right By 66 Degrees
62 - Resize by 35% - Mirror
82 - Resize By 35%
33 - Resize by 55%
Activate Eraser Tool & Erase Part Around The Ball
Makes It Look Like Smoke Coming From Crystal Ball
28 - Resize by 90% - Free Rotate Left By 44 Degrees - NO DS NEEDED
27 - Resize By 75% - NO DS NEEDED
35 - Resize By 15
31 - Resize By 40%
65 - Resize By 60% - NO DS NEEDED
Layers - Arrange - Send Down To The Bottom
Layers - Duplicate - Mirror
Open Paper 16
Layers - Promote Background Layer To Raster - New Mask Layer From Image
Select Mask - Mask 42 MB & SW
Make sure Source Luminance is checked only
Copy Merged and Paste as new layer
Layers - Arrange - Send To Bottom
Resize By 80% - NO DS NEEDED
Repeat Xero - Radiance
Activate Your Top Layer
Layers New Raster Layer - Add All Copyright Info
Layers New Raster Layer - Add Watermark
Layers New Raster Layer
Select Your Text Tool
Select Your Font I have used Magician- Size 55 - Stroke 2 - Bold
Click Foreground and Change to #dd38ad
Click Background and Change to #a31684
Type Your Name
Convert Raster To Layer
Adjust - Sharpen - Sharpen More
Layers - Duplicate
Activate Original Layer
Plug Ins: Eyecandy 4000 - Gradient Glow
Color: #3e9ed9
Glow Width: 7.00
Soft Corners: 25
Overall Op: 100
Draw Only Outside Selection Checked
Click Ok
Adjust - Add/Remove Noise - Add Noise:-
Gaussian & Monochrome Checked
Noise: 50%
All Done
Thank you very much for following my Tutorial
I would love to see your results
and
any feedback
Please Email Me
At
Dont Forget To Check-Out Michelle's Blog
Tutorial Written By ChocUkDesigns
Retained by "Copyright © ChocUkDesigns 2015 All rights Reserved"
91IO-QFQB-1GSO-SJR6
CT ChocUkDesigns For Dance In The Rain PTU Tutorial For Green Steam Scrap Kit
CT ChocUkDesigns For Dance In The Rain
PTU Tutorial For Green Steam Scrap Kit


DO NOT COPY AND SHARE
PLEASE DIRECT PEOPLE TO MY BLOG
DO NOT CLAIM AS YOUR OWN
Supplies Need:-
Scrap Kit Used: DITR's - Green Steam Kit
Which You Can Purchase This Awesome Kit At:-
Inspirations Of Scrapfriends:-
Or
You Can Buy The Color Bundle Which Includes
Purple Steam, Blue Steam, Green Steam, Red Steam & Pink Steam Scrap Kits
Inspirations Of Scrapfriends:-
Or
Heartbeatz Creationz
Tube: Exclusive By Orkusart: SteamGirl
Please Note You Need A License To Used This Tube
You Can Download By Purchasing
An Exclusive Club Membership At:-
PicsForDesign
Plug Ins: Greg's Filter Facctory Vol.II - Pool Shadow
EyeCandy 4000 - Gradient Glow
Font Of Choice
A Working knowledge Of PSP
Lets Begin With My Tutorial
Open PSP and Your Tube
Open a New 800 x 800 Resolution 200
Using The Following Drop Shadow UNLESS STATED:-
V&H: 1 OP: 60 Blur: 6 Color: Black
Repeat With V&H: -1
14 - Resize By 85%
Activate Tube & Copy
Paste As New Layer & Resize by 55% - Mirror
Open & Copy Paper 4
Paste As New Layer & Resize by 55%
Layers - Arrange - Send Down To The Bottom
Move Into Frame
Activate Tube Again & Magic Wand Tool
Draw Round Upper Body & Copy As Merged
Paste As New Layer & Place In Frame
Plug Ins: Greg's Filter Facctory Vol.II - Pool Shadow:-
Diagonal: 50
Center: 50
Horizontal: 50
Diagonal: 50
Horizontal: 50
Vertical: 50
Intensity: 128
Lightness: 128
Click Ok
Layers - Properties:-
Blend Mode: Hard Light
Op: 80%
Click Ok
Adjust - Sharpen - Sharpen More
Activate Frame Layer & Magic Wand Tool
Click Outside Frame
Selections - Invent - Contract By 55 - Invent
Activate Close Up Version Of Tube Layer
Hit Delete On Your Keyboard
KEEP SELECTED
Repeat For Paper Layer
Selections - None
Activate Frame Layer
Continue To Open & Copy The Flowwing Elements:-
60 - Resize By 50% - Mirror
55 - Resize By 45%
58 - Resize By 50% - Mirror
100 - Resize By 90%
108 - Resize by 50% - NO DS NEEDED
Plug Ins: Eyecandy 4000 - Gradient Glow
Color: #b1dcb2
Glow Width: 5.00
Soft Corners: 25
Overall Op: 100
Draw Only Outside Selection Checked
Click Ok
102 - Resize By 35% - NO DS NEEDED
Repeat Plug In
54 - Resize By 45%
107 - Resize By 70%
118 - Resize By 75% - NO DS
Repeat Plug In
138 - Resize By 90% - NO DS
Repeat Plug In
31 - Resize by 45% - Free Rotate Right By 11 Degrees
63 - Resize by 45% - Mirror - Free Rotate Left By 5 Degrees
59 - Resize By 40% - NO DS
Repeat Plug In
8 - Resize By 50%
Layers - Arrange - Send Down To The Bottom
9 - Resize By 50%
147
Layers - Duplicate
Activate Top Layer
Layers - Merge - Merge Visible
Resize by 95%
Layers New Raster Layer - Add All Copyright Info
Layers New Raster Layer - Add Watermark
Layers New Raster Layer
Select Your Text Tool
Select Your Font I have used
Lafayet Scripts - Size 72 (resize To Preferred) - Stroke 2 - Bold
Click Foreground and Change to #8ffa3f
Click Background and Change to #193919
Type Your Name
Convert Raster To Layer
Adjust - Sharpen - Sharpen More
Plug Ins: Eyecandy 4000 - Gradient Glow
Color: #769278
Glow Width: 10.00
Soft Corners: 25
Overall Op: 100
Draw Only Outside Selection Checked
Click Ok
Adjust - Sharpen - Sharpen More
All Done
Thank you very much for following my Tutorial
I would love to see your results
and
any feedback
Please Email Me
At
Don't Forget To Check-Out Her Blog:-
Dance In The Rain
Tutorial Written By ChocUkDesigns
Retained by "Copyright © ChocUkDesigns 2015 All rights Reserved"
ZPAX-A3ZR-0BJR-1WFV
Monday 28 September 2015
CT ChocUkDesigns For ChocUkDesigns PTU Tutorial For Cute Autumn Scrap Kit
CT ChocUkDesigns For ChocUkDesigns
PTU Tutorial For Cute Autumn Scrap Kit


DO NOT COPY AND SHARE
PLEASE DIRECT PEOPLE TO MY BLOG
DO NOT CLAIM AS YOUR OWN
Supplies Need:-
Scrap Kit Used: CD's - Cute Autumn
Or
PicsForDesign
Tube: Zlata M's - Raining Day
Please Note You Need A License To Use This Tube
Which You Can Also Purchase
At PicsForDesign
Mask - Creative Misfits - Splatter Mask By Sue
Which You Can Download From Their Blog
Plug Ins: Xero - Radiance
EyeCandy 4000 - Gradient Glow
Font Of Choice
A Working knowledge Of PSP
Lets Begin With My Tutorial
Open PSP and your Tubes
Open a New 800 x 800 Resolution 200
Use The Following Drop Shadow Unless Stated
V&H: 2 OP: 60 Blur: 5 Color: Black
Repeat V&H: -1
Open & Copy Frame 8
Paste As New Layer & Mirror
Open & Copy Paper 15
Paste As New Layer & Resize By 60%
Free Rotate Left By 22 Degrees & Move Into Frame
Layers - Arrange - Send Down To Bottom
Activate Close Up Of Tube & Copy
Move Into Frame
Layers - Duplicate - Mirror
Layers - Merge - Merge Down
Plug Ins: Xero - Radiance
Strangeness: 50
Charm: 40
Truth: 130
Beauty: 255
Click Ok
Adjust - Sharpen - Sharpen More
Layers - Properties:-
Blend Mode: Hard Light
Click Ok
Activate Frame Layer & Magic Wand Tool
Click Inside Frame
Selections - Modify - Expand - Invent
Activate Tube Layer & Hit Delete On Your Keyboard
KEEP SELECTED
Activate Paper Layer & Hit Delete Again
Selections None
Activate Frame Layer
Activate Full Version Of Tube & Copy
Paste As New Layer & Resize By 70%
Move To Center Of Frame
Activate Frame Layer Again
Open & Copy The Following Elements:-
75 - Resize By 50%
Layers - Duplicate - Mirror
53
52 - Mirror
86 - Resize By 50%
Layers - Duplicate - Mirror
63
Layers - Duplicate - Mirror
Tube 1 - Resize By 25%
Tube 3 - Resize by 25%
54 - Resize by 65%
55 - Resize By 65%
35
41
80 - Resize By 50% - Free Rotate Left By 90 Degrees
Layers - Arrange - Send Down To The Bottom
102
34 - Resize By 85%
59 - Resize By 85%
Layers - Duplicate - Mirror
82 - Resize By 65%
73 - Resize By 65%
79 - Resize By 35% - Free Rotate Left By 22 Degrees
Layers - Duplicate - Mirror
39
98 - Resize By 50%
Layers - Duplicate - Mirror
Activate Tube Layer
40 - Resize By 75% - Free Rotate Left By 5 Degrees
81 - Resize By 25% - Free Rotate Left By 22 Degrees
88 - Resize By 25%
Adjust - Sharpen - Sharpen More
46 - Resize by 25% - Free Rotate Right By 22 Degrees
Layers - Merge - Merge Visible
Resize By 90%
Open Paper 10
Layers - Promote Background Layer To Raster - New Mask Layer From Image
Select Mask - Creative Misfits - Splatter Mask By Sue
Make sure Source Luminance is checked only
Copy Merged and Paste as new layer
Layers - Arrange - Send To Bottom
Resize By 90%
Activate Top Layer
Activate Top Layer
Layers New Raster Layer - Add All Copyright Info
Layers New Raster Layer - Add Watermark
Layers New Raster Layer
Select Your Text Tool
Select Your Font I have used Sick Capital Vice - Size 72 - Stroke 2 - Bold
Click Foreground and change to #ae1812
Click Background and Change to #d4412a
Type Your Name
Convert Raster To Layer
Plug Ins: Eyecandy 4000 - Gradient Glow
Color: #fcc45d
Glow Width: 7.00
Soft Corners: 25
Overall Op: 100
Draw Only Outside Selection Checked
Click Ok
Save As Png
All Done
Thank you very much for following my Tutorial
I would love to see your results
and
any feedback
Please Email Me
At
ChocUkDesigns
Tutorial Written By ChocUkDesigns
Retained by "Copyright © ChocUkDesigns 2015 All rights Reserved"
T2OD-K6PC-LD6P-JEXP
CT ChocUkDesigns For Michelle's Myths PTU Tutorial For Faery Dreams Scrap Kit
CT ChocUkDesigns For Michelle's Myths
PTU Tutorial For Faery Dreams Scrap Kit


DO NOT COPY AND SHARE
PLEASE DIRECT PEOPLE TO MY BLOG
DO NOT CLAIM AS YOUR OWN
Supplies Need:-
Scrap Kit Used: Michelle's Myth's - Faery Dreams
Which You Can Also Purchase At
Inspirations Of ScrapFriends
&
Smiley Creations Shop
Tube: Orkusart Exclusive: Forest Princess
You Can Download This Tube
By Purchasing An Exclusive Club Membership
At PicsForDesign:-
Mask - Vix_Mask404
Which You Can Download From Her Blog
Plug In: EyeCandy 4000 - Gradient Glow
Font Of Choice
A Working knowledge Of PSP
Lets Begin With My Tutorial
Open PSP and your Poser
Open a New 800 x 800 Resolution 200
Use The Following Drop Shadow Unless Stated
V&H: 1 OP: 60 Blur: 2 Color: Black
Repeat V&H: -1
Open & Copy The Following Elements:-
54 - Erase Right Side Of Tree
Layers - Duplicate - Mirror
14 - Erase Left Side Of Tree
Layers - Duplicate - Mirror
7
41
63 - Resize By 85% - Mirror
73 - Resize By 70%
34 - Resize By 50%
46
80 - Resize By 50%
111
50 - Resize By 50% - NO DS NEEDED
113 - Resize By 30%
99 - Resize By 30% - NO DS NEEDED
78 - Resize By 30%
130 - Resize By 40%
81 - Resize By 40%
48 - Resize By 40%
27 - Resize By 35% - Mirror
118 - Resize By 35%
26 - Resize By 35%
25 - Resize By 35% - Mirror
Activate Tube & Copy
Paste As New Layer & Resize By 50%
Open Paper 16
Layers - Promote Background Layer To Raster - New Mask Layer From Image
Select Mask - Vix_Mask404
Make sure Source Luminance is checked only
Copy Merged and Paste as new layer
Layers - Arrange - Send To Bottom
Resize By 95%
Activate Your Top Layer
Layers New Raster Layer - Add All Copyright Info
Layers New Raster Layer - Add Watermark
Layers New Raster Layer
Select Your Text Tool
Select Your Font I have used FairydustB- Size 48- Stroke 2 - Bold
Click Foreground and Change to #8438e8
Click Background and Change to #3a9cba
Type Your Name
Convert Raster To Layer
Plug Ins: Eyecandy 4000 - Gradient Glow
Color: #fff922
Glow Width: 5.00
Soft Corners: 25
Overall Op: 100
Draw Only Outside Selection Checked
Click Ok
All Done
Thank you very much for following my Tutorial
I would love to see your results
and
any feedback
Please Email Me
At
Dont Forget To Check-Out Michelle's Blog
Tutorial Written By ChocUkDesigns
Retained by "Copyright © ChocUkDesigns 2015 All rights Reserved"
FA3D-YOTX-C7XO-PWM4
CT ChocUkDesigns For Dance In The Rain PTU Tutorial For Pink Steam Scrap Kit - Timeline Set
CT ChocUkDesigns For Dance In The Rain
PTU Tutorial For Pink Steam Scrap Kit - Timeline Set


Supplies Need:-
Scrap Kit Used: DITR's - Blue Steam Kit
Which You Can Purchase This Awesome Kit At:-
Inspirations Of Scrapfriends:-
Or
You Can Buy The Color Bundle Which Includes
Purple Steam, Blue Steam, Green Steam, Red Steam & Pink Steam Scrap Kits
Inspirations Of Scrapfriends:-
Or
Heartbeatz Creationz
Tube: Lady Mishka - Steampunk Chibi
Which Is Included In The Kit
Plug In: AAA Frames - Foto Frame
EyeCandy 4000 - Gradient Glow
Font Of Choice
A Working knowledge Of PSP
Lets Begin With My Tutorial

For Banner
Open a New 851 x 315 Resolution 200
Using The Following Drop Shadow UNLESS STATED:-
V&H: 1 OP: 60 Blur: 3 Color: Black
Repeat With V&H: -1
Open & Copy Paper 9
Paste As New Layer
Activate Chibi & Copy
Paste As New Layer & Resize By 85%
Activate Paper Layer
Open & Copy The Following Elements:-
Also Use The Following Instead Of DS:-
Plug Ins: Eyecandy 4000 - Gradient Glow
Color: #ffb9f3
Glow Width: 5.00
Soft Corners: 25
Overall Op: 100
Draw Only Outside Selection Checked
Click Ok
13 - Resize By 70%
Adjust - Sharpen - Sharpen More
Repeat Plug In
37 - Resize By 40% - Mirror
Layers - Arrange - Move Down x2
9 - Resize By 40%
95 - Resize by 35%
50 - Resize by 55%
128 - Resize by 25%
130 - Resize by 25%
126 - Resize by 65%
51 - Resize By 50%
18 - Resize by 55%
142 - Resize By 40%
113 - Resize By 25% - Mirror
17 - Resize By 30% - Mirror
103 - Resize By 20% - Mirror
Hold Shift + D To Duplicate Canvas
Move To Side For Now Will Be Using For Avatar
Layers - Merge - Merge All (Flattern)
Plug In: AAA Frames - Foto Frame:-
Width: 10
Brightness:50
Stroke: 0
Matte: 0
Red: 0
Green: 0
Blue: 0
Op:100
Click Ok
Image - Add Borders
Original Dimensions - Pixels Selected
Symmetric Checked
Size In Pixels:10
Color: White
Click Ok
Activate Magic Wand & Click Inside Border
Selections - Invent
Effects - 3D Effects
Cutout:-
Offset:- Vertical & Horisontal: 3
Attributes:- Opacity: 50 Blur: 20.00
Color:- Shadow Color: #ffbff9 Back Fill Interior With Color: Unchecked
Cick Ok
Repeat With V&H:-3
Selections - Invent
Open Paper 3
Click Foreground and change to Pattern
Select Paper 3 & Use The Following Settings:-
Angle: 0 & Scale:50
Click Ok
Activate Flood Fill Tool & Click Inside Border
Add/Remove Noise - Add Noise:-
Gaussian & Monochrome Checked - Noise: 50%
Adjust - Sharpen - Sharpen More
Effects - 3D Effects - Inner Bevel:-
Bevel:-
Bevel: 2
Width: 14
Image:-
Smoothness: 73
Depth:2
Ambience: 10
Shininess: 40
Light:-
Color: White
Angle: 315
Intensity: 30
Elevation: 50
Click Ok
Selections None
Image - Add Borders
Original Dimensions - Pixels Selected
Symmetric Checked
Size In Pixels:15
Color: White
Click Ok
Activate Magic Wand & Click Inside Border
Open Paper 15
Click Background and change to Pattern
Select Paper 15 & Use The Following Settings:-
Angle: 311 & Scale:50
Click Ok
Activate Flood Fill Tool & Click Inside Border
Bevel:-
Bevel: 2
Width: 20
Image:-
Smoothness: 20
Depth:70
Ambience: 10
Shininess: 10
Light:-
Color: White
Angle: 315
Intensity: 40
Elevation: 40
Click Ok
Selections None
Repeat Steps For Borders With Pixel Size 10
Image - Resize With Following Settings:-
Make Sure At Bottom Use The Following Settings:-
Resample Using: Bicubic & Checked
Maintain Original Print Size & Lock Aspect Ratio - Both Unchecked
Resize All Layers: Checked
Pixel Dimensions (100%x100%)
Width: 851
Height: 315
Pixels: Selected From Drop Down
Print Size:
Width: 2.837
Height: 1.050
Pixels: Selected From Drop Down
Resolution: 300.000
Pixels/Centimeter: Selected From Drop Down
Click Ok
Activate Your Top Layer
Layers New Raster Layer - Add All Copyright Info
Layers New Raster Layer - Add Watermark
Layers New Raster Layer
Select Your Text Tool
Select Your Font I have used
Gear Grank - Size 40 (resize To Preferred) - Stroke 1 - Bold
Click Foreground and change to #ffb9f3
Click Background and Change to #e000b8
Type Your Name
Convert Raster To Layer
Adjust - Sharpen - Sharpen More
Plug Ins: Eyecandy 4000 - Gradient Glow
Color: #ffc45c
Glow Width: 5.00
Soft Corners: 25
Overall Op: 100
Draw Only Outside Selection Checked
Click Ok
All Done
Save As Either JPEG Or PNG

For Avatar
Activate Duplicate Image from Earlier
Hide Steampunk Word Art
Move Chibi To Where You Like
I Moved Mine To Left Hand Side Of Canvas
Resize By 80%
Activate Crop Tool
Draw Inside Timeline Cover
Make Sure Width Is: 300
Make Sure Height Is: 300
Place Square In Position Your Happy With
Once Happy Double Click On Your Mouse
Layers - Merge - Merge All (Flatten)
Mirror
Plug In: AAA Frames - Foto Frame:-
Width: 10
Brightness: 50
Stroke: 0
Matte: 0
Red: 0
Green: 0
Blue: 0
Op:100
Click Ok
Image - Add Borders
Original Dimensions - Pixels Selected
Symmetric Checked
Size In Pixels:10
Color: White
Click Ok
Activate Magic Wand & Click Inside Border
Selections - Invent
Effects - 3D Effects
Cutout:-
Offset:- Vertical & Horisontal: 3
Attributes:- Opacity: 50 Blur: 20.00
Color:- Shadow Color: #ffbff9 Back Fill Interior With Color: Unchecked
Cick Ok
Repeat With V&H:-3
Selections - Invent
Open Paper 3
Click Foreground and change to Pattern
Select Paper 3 & Use The Following Settings:-
Angle: 0 & Scale:50
Click Ok
Activate Flood Fill Tool & Click Inside Border
Add/Remove Noise - Add Noise:-
Gaussian & Monochrome Checked - Noise: 50%
Adjust - Sharpen - Sharpen More
Effects - 3D Effects - Inner Bevel:-
Bevel:-
Bevel: 2
Width: 14
Image:-
Smoothness: 73
Depth:2
Ambience: 10
Shininess: 40
Light:-
Color: White
Angle: 315
Intensity: 30
Elevation: 50
Click Ok
Selections None
Image - Add Borders
Original Dimensions - Pixels Selected
Symmetric Checked
Size In Pixels:15
Color: White
Click Ok
Activate Magic Wand & Click Inside Border
Open Paper 15
Click Background and change to Pattern
Select Paper 15 & Use The Following Settings:-
Angle: 311 & Scale:50
Click Ok
Activate Flood Fill Tool & Click Inside Border
Bevel:-
Bevel: 2
Width: 20
Image:-
Smoothness: 20
Depth:70
Ambience: 10
Shininess: 10
Light:-
Color: White
Angle: 315
Intensity: 40
Elevation: 40
Click Ok
Selections None
Repeat Steps For Borders With Pixel Size 10
Layers - Merge - Merge All (Flatten)
Activate Your Top Layer
Layers New Raster Layer - Add All Copyright Info
Layers New Raster Layer - Add Watermark
Layers New Raster Layer
Select Your Text Tool
Select Your Font I have used
Gear Grank - Size 72 (resize To Preferred) - Stroke 1.5 - Bold
Click Foreground and change to #ffb9f3
Click Background and Change to #e000b8
Type Your Name
Convert Raster To Layer
Adjust - Sharpen - Sharpen More
Plug Ins: Eyecandy 4000 - Gradient Glow
Color: #ffc45c
Glow Width: 5.00
Soft Corners: 25
Overall Op: 100
Draw Only Outside Selection Checked
Click Ok
All Done
Save As Either JPEG Or PNG
Thank you very much for following my Tutorial
I would love to see your results
and
any feedback
Please Email Me
At
Dont Forget To Check-Out DITR's Blog
Tutorial Written By ChocUkDesigns
Retained by "Copyright © ChocUkDesigns 2015 All rights Reserved"
0JYI-W5OB-YUZU-1X8L
Subscribe to:
Posts
(Atom)
Copyrighted

My Stores


My CT


Who I CT For


Who I Guest CT For

CTs I Manage
CU License


