Grab 1 OF My Blinkies


My Logo

My Licenses


ChocUkDesigns On Facebook


Friday 31 October 2014
CT ChocUkDesigns For Dance In The Rain PTU Tutorial For Welcome To My Nightmare Scrap Kit
CT ChocUkDesigns For Dance In The Rain
PTU Tutorial For Welcome To My Nightmare Scrap Kit


DO NOT COPY AND SHARE
PLEASE DIRECT PEOPLE TO MY BLOG
DO NOT CLAIM AS YOUR OWN
Supplies Need:-
Scrap Kit Used: DITR's - Welcome To My Nightmare
Which You Can Also Purchase At
PicsForDesigns:-
Or
Scrap Candy
Or
Lollipops N Gumdrops
Tube: Zlata_M - Happy Hallowen 2013
This Is A Bonus Tube Given To Customers In Oct 2013
You Can Purchase Other Zlata_M Tubes At PicsForDesigns
Please Note You Need A License To Use This Tube
Please See TOU
Masks - Mask 42 By MoonBeams & Spider Webs
Which You Can Download
Font Of Choice
A Working knowledge Of PSP
Lets Begin With My Tutorial
Open PSP and Your Tube
Open a New 700 x 700 Resolution 200
Open & Copy Frame 1
Paste As New Layer & Add The Following Drop Shadow:-
V&H:1 OP:100 Blur: 5.00 Color: Black
Repeat With V&H -1
Activate Freehand Selection Tool & Draw Round The Top Half Of Your Tube
Paste as New Layer & Place Inside Frame
Layers - Arrange - Move Down
Open & Copy Paper 8
Paste as New Layer & Place Inside Frame
Layers - Arrange - Move Down
Activate Frame Layer & Magic Wand Tool
Click Out Side Of Frame, Selections - Invent
Selections - Modify - Contract By 10, Selections Invent
Select Paper Layer & Hit Delete On Keyboard KEEP SELECTED
Select Tube Layer & Hit Delete On Keyboard, Selections - None
Kepp Tube Layer Selected & Add The Following Drop Shadow:-
V&H:1 OP:100 Blur: 5.00 Color: Black
Repeat With V&H -1
Layers - Properties - Blend Mode - Hard Light & OP: 50
Activate Top Layer
Return To Your Tube & Copy Full Length (I have used the Crow Which Comes With The Tube)
Paste As New Layer & Resize By 77% - Move To Left Handside Of Frame
& Repeat Drop Shadow From Above & V&H: -1
Add The Following Elements Using The Following Drop Shadow Unless Stated:-
V&H:1 OP:100 Blur: 5.00 Color: Black
Repeat With V&H -1
Element 122 - Resize By 40% - Mirror - Use White For Color On Drop Shadow
Element 80 - Resize By 40%
Element 55 - Resize By 25% - Drop Shadow V: -1 H:1 OP:100 Blur: 5.00 Color: Black - ONLY
Element 56 - Resize By 25% - Drop Shadow V: -1 H:1 OP:100 Blur: 5.00 Color: Black - ONLY
Element 124 - Resize By 40% - Use White For Color On Drop Shadow
Element 100 - Resize By 40% - Layers - Send To Bottom
Element 81 - Resize By 25%
Element 73 - Resize By 30%
Element 75 - Resize By 30% - Mirror
Element 64 - Resize By 25%
Element 33 - Resize By 50%
Element 16 - Resize By 25%
Element 30 - Resize By 25%
Element 108 - Resize By 25%
Element 41 - Resize By 75%
Layers - Dulicate - Move Down Slightly - Layers - Merge - Merge Down
Layers - Arrange - Send To Bottom
Element 76 - Resize By 25%
Element 10 - Resize By 25%
Element 45 - Resize By 50% - Use White For Color On Drop Shadow
Layers - Duplicate - Mirror
Layers - Duplicate - Move To Other Side OF Tube
Layers - Duplicate - Mirror
Element 67 - Resize By 20% - Mirror
Element 24 - Resize By 10%
Open & Copy Paper 5
Layers - Promote Background Layer To Raster - New Mask Layer From Image
Select Mask - Mask 42 MB & SW - Make sure Source Luminance is checked only
Copy Merged and Paste as new layer
Layers - Arrange - Send To Bottom
Resize By 125%
Activate Top Layer
Layers New Raster Layer - Add All Copyright Info
Layers New Raster Layer - Add Watermark
Layers New Raster Layer
Activate Your Preset Tool and select Eclipse
Draw a Circle once happy with size place near the top left hand corner of Frame (9)
Layers New Raster Layer
Select Your Text Tool
Make Sure The A Goes on a slant and click on your circle you just drew
Select Your Text Tool
Select Your Font I have used Aurora Script- Size 72 - Stroke 2 - Bold
Click Foreground and change to White
Click Background and Change to Black
Type Your Name
Convert Raster To Layer
Add The Following Drop Shadow:-
V: 1 H: -1 OP: 100 Blur: 5 Color: Black
Click Ok
Delete your Preset Shape Layer
All Done
Thank you very much for following my Tutorial
I would love to see your results
and
any feedback
Please Email Me
At
Dont Forget To Check-Out DITR's Blog
Tutorial Written By ChocUkDesigns
Retained by "Copyright © ChocUkDesigns 2014 All rights Reserved"
CQH4-QH3N-N7XK-ZXEP
Thursday 30 October 2014
Halloween Tag Show Off For KRM Radio
Halloween Tag Show Off For KRM Radio
Hi All heres a tag I made For KRM Radio's
The Rev Schicklegruber
Check-Out His Show!!!!!!
The Rev Schicklegruber
Check-Out His Show!!!!!!

I Have Usin PinHead By Kiwi FireStorm
You Can Purchase His Tubes From The PSP Project:-
I Made this tag using 1 of my good friend's Scrap Kits by Dance In The RainCalled The Dark & Deadly Village

You Can Purchase This Kit From The Following Stores:-
PicsForDesigns
Scrap Candy
&
Lollipops & Gumdrops
Halloween Tag Show Off For KRM Radio
Halloween Tag Show Off For KRM Radio
Hi All heres a tag I made For DJ Karebear Of
KRM Radio
Check-Out Her Show Tonight !!!!!!
KRM Radio
Check-Out Her Show Tonight !!!!!!

Don't forget you can tune in live on

I Have Used Halloween By Alex Prihodko
& Box With Magic Which Is An Exclusive Tube
Exclusive Tubes You Need A PicsForDesign Membership
You Can Purchase Both Tubes From PicsForDesign:-

I Have Also Used Michelle's Myths Scrap Kit Black Magic
You Can Purchase This Awesomely Mystical & Magical
Scrap Kit From The Following Stores:-
PicsForDesigns
&
Scrap Candy
Don't Forget To Check-Out Her Blog
Halloween Tag Show Off For KRM Radio
Halloween Tag Show Off For KRM Radio
Hi All heres a few tags I made For DJ Sniper Of
KRM Radio
KRM Radio

Don't forget you can tune in live on
I Have Used Jason By Kiwi FireStorm Which Was In A Bonus Horror 3 Pack
Given For Free Over The Halloween Period.
I Have Also Used Kiwi FireStorm's Chucky's Girl
You Can Purchase His Tubes From The PSP Project:-
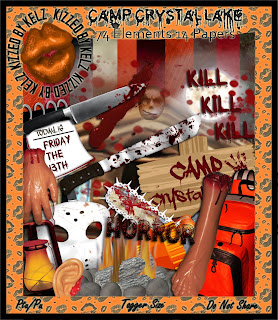
I Have Also Used KizzedByKelz's Scrap Kit Camp Crystal Lake
You Can Purchase This Awesomely Horrortastic
Scrap Kit From The Following Stores:-
PicsForDesigns
Scrap Candy
&
Twilight Scraps
Don't Forget To Check-Out Her Blog
Halloween Tag Show Off For KRM Radio
Halloween Tag Show Off For KRM Radio
Hi All heres a Halloween tag I made For Acey Of
KRM Radio

KRM Radio
Don't forget you can tune in live on
I Have Used Ann By Spazz
You Can Purchase Her Tubes From Her Store Spazz'd Art:-
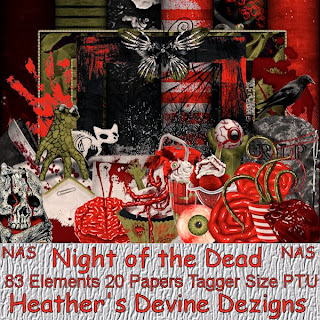
I Have Also Used Heather's Devine Dezigns's Scrap Kit
Night Of The Dead
You Can Purchase This Awesome Zombie
Scrap Kit From The Following Stores:-
PicsForDesigns
&
Mystical Scraps
Don't Forget To Check-Out Her Blog
Halloween Tag Show Off For KRM Radio
Halloween Tag Show Off For KRM Radio
Hi All heres a Halloween tag I made For DJ Simpleman Of
KRM Radio
Check-Out His Show Tonight !!!!!!
KRM Radio
Check-Out His Show Tonight !!!!!!

Don't forget you can tune in live on
I Have Used Freddie By Kiwi FireStorm Which Was In A Bonus Horror 3 Pack
Given For Free Over The Halloween Period.
You Can Purchase His Tubes From The PSP Project:-

I Have Also Used KizzedByKelz's Scrap Welcome To My Nightmare
You Can Purchase This Awesomely Horrortastic
Scrap Kit From The Following Stores:-
PicsForDesigns
Scrap Candy
&
Spazz'd Art
Don't Forget To Check-Out Her Blog
Tuesday 28 October 2014
Halloween Tag Show Off For KRM Radio
Halloween Tag Show Off For KRM Radio
Hi All heres a tag I made For KRM Radio's
DJ Karebear, Acey & Chocy
Check-Out Their Halloween Special 2nite!!!!!!
DJ Karebear, Acey & Chocy
Check-Out Their Halloween Special 2nite!!!!!!

I Have Used 3 Tubes By Arthur Crowe
You Can Purchase Them At His Store:-
http://arthurcrowesfactory.com/store/
I Made this tag using 1 of my good friend's Scrap Kits by Dance In The Rain
Called Halloween Spook

You Can Purchase Them At His Store:-
http://arthurcrowesfactory.com/store/
I Made this tag using 1 of my good friend's Scrap Kits by Dance In The Rain
Called Halloween Spook
You Can Purchase This Kit From The Following Stores:-
PicsForDesigns
Scrap Candy
&
Lollipops & Gumdrops
Halloween Tag Show Off For KRM Radio
Halloween Tag Show Off For KRM Radio
Hi All heres a few tags I made For DJ Alucard Of
KRM Radio
Check-Out His Show Tonight !!!!!!
KRM Radio
Check-Out His Show Tonight !!!!!!


Here Are His Halloween Tags ;)


Don't forget you can tune in live on
I Have Used Chucky By Kiwi FireStorm Which Was In A Bonus Horror 3 Pack
Given For Free Over The Halloween Period.
I Have Also Used Kiwi FireStorm's Chucky's Girl
You Can Purchase His Tubes From The PSP Project:-
I Have Also Used KizzedByKelz's Scrap Kit Camp Crystal Lake
You Can Purchase This Awesomely Horrortastic
Scrap Kit From The Following Stores:-
PicsForDesigns
Scrap Candy
&
Twilight Scraps
Don't Forget To Check-Out Her Blog
Sunday 26 October 2014
CT ChocUkDesigns For Michelle's Myths/Michelle's Myths Dolls PTU Tutorial For Hope Doll & Matching Scrap Kit
CT ChocUkDesigns For Michelle's Myths/Michelle's Myths Dolls
PTU Tutorial For Hope Doll & Matching Scrap Kit


DO NOT COPY AND SHARE
PLEASE DIRECT PEOPLE TO MY BLOG
DO NOT CLAIM AS YOUR OWN
Supplies Need:-
Scrap Kit Used: Michelle's Myths - Hope
Which You Can Also Purchase At
PicsForDesigns:-
Or
Scrap Candy
Poser: Michelle's Myths Dolls - Hope
You Can Purchase This Poser At
PicsForDesign
Kit & Doll
Please Note You Need A License To Use This Tube
Masks - Vix_Mask363
Which You Can Download
Plug Ins - EyeCandy 4000 - Gradient Glow
MuRa's Seamless - Blend Emboss Alpha
Font Of Choice
A Working knowledge Of PSP
Lets Begin With My Tutorial
Open PSP and Your Poser
Open a New 700 x 700 Resolution 200
Open & Copy Frame (4)
Paste As New Raster Layer & Resize By 75%
Move Slightly To Right & Down on Canvas
Using Your Poser Copy The Half Size
Paste As New Raster Layer & Resize By 50%
Layers - Arrange - Move Down
Move To Inside Your & Activate Your Eraser Tool & Erase The Parts That Hang Out Of The Frame
Open & Copy Paper (8)
Paste As New Layer & Resize By 50%
Move To inside Of Frame, Layers - Arrange - Move Down
Activate Poser Layer, Layers - Properites - Luminance (Legacy)
Activate Top Layer
Copy & Paste Full Version Of Poser
Paste As New Layer & Resize By 75%
Move To Left Handside Of Frame & Add The Following Drop Shadow:-
V&H: 3, OP: 100, Blur: 5.00 Color: #ff91af
Repeat With V&H: -3
Open & Copy The Following Elements
Adding The Following Drop Shadow Unless Stated
V&H: 2, OP: 100, Blur: 5.00 Color: #ff91af
Repeat With V&H: -2
Element (24) - Resize By 50%
Element (14)
Element (60) - Resize By 30%
Element (65) - Reszie By 30%, Free Rotate Right By 22 Degrees
Element (18)
Element (29) - Resize By 50%
Element (30) - Resize By 50%
Element (19)
Element (12) - Resze By 50%
Layers - Duplicate - Mirror
Element (16) - Resize By 50%
Element (28) - Resize By 5%
Layers - Duplicate
Element (67) - Resize By 60%
Layers - Duplicate - Mirror
Element (64) - Resize By 60% - NO DS
Layers - Duplicate - Mirror - Flip
Element (45) - Resize By 90% - NO DS
Element (46) - Resize By 85% - Free Rotate Right By 22 Degrees
Element (40) - Resize By 60%
Element (37) - Free Rotate Left By 50 Degrees & Resize By 30%
Element (38) - Free Rotate Right By 44 Degrees & Resize By 30%
Open Paper (9)
Layers - Promote Background Layer To Raster - New Mask Layer From Image
Select Mask Vix_Mask363 - Make sure Source Luminance is checked only
Copy Merged and Paste as new layer
Mirror & Resize By 90%
Layers - Arrange - Send To Bottom
Plug Ins: Mura Seamless - Blend Emboss Alpha
Use The Following Settings:-
Base Color R: 128
Base Color G: 128
Base Color B: 128
Emboss: 64
Base <-> Source: 255
Opague Emboss: 128
Click Ok
Repeat
Plug Ins: Eyecandy 4000 - Gradient Glow
Color: #e64c90
Glow Width: 3.00
Soft Corners: 25
Overall Op: 100
Draw Only Outside Selection Checked
Click Ok
Plug Ins: Eyecandy 4000 - Gradient Glow
Color: #ffe1f2
Glow Width: 10.00
Soft Corners: 25
Overall Op: 100
Draw Only Outside Selection Checked
Click Ok
Activate Your Top Layer
Layers New Raster Layer - Add All Copyright Info
Layers New Raster Layer - Add Watermark
Layers New Raster Layer
Select Your Text Tool
Select Your Font I have used Ribbon Of Hope - Size 55 - Stroke 2 - Bold
Click Foreground and change to #bb3c74
Click Background and Change to #ffeafd
Type Your Name
Convert Raster To Layer
Plug Ins: Eyecandy 4000 - Gradient Glow
Color: #ffe1f2
Glow Width: 5.00
Soft Corners: 25
Overall Op: 100
Draw Only Outside Selection Checked
Click Ok
All Done
Thank you very much for following my Tutorial
I would love to see your results
and
any feedback
Please Email Me
At
Dont Forget To Check-Out Michelle's Blog
Tutorial Written By ChocUkDesigns
Retained by "Copyright © ChocUkDesigns 2014 All rights Reserved"
SGLL-E1ZM-KVNW-6EH3
Thursday 23 October 2014
CT ChocUkDesigns For Heather Devine Dezigns
CT ChocUkDesigns For Heather's Devine Dezigns
I Have Made This Timeline/Forum Set Using Her Scrap Kit
Down The Rabbit Hole


You Can Purchase This Cheshire Grin Scrap Kit
At The Following Stores:-
PicsForDesigns
http://picsfordesign.com/en/catalogue/id_113094_down_the_rabbit_hole.pix
And
Mystical Scraps
http://www.mysticalscraps.com/index.php?main_page=product_info&cPath=7_205&products_id=10124
Dont Forget To Check-Out Heather's Blog
I Have Made This Timeline/Forum Set Using Her Scrap Kit
Down The Rabbit Hole
This Crazy Kit has 107 Mad Elements & 23 Off With Your Head Papers
All With An Alice In Wonderland Theme.
I Just Love This Kit & Its Perfect For All Alice Fans
Wanting A Wonderland Theme!
You Can Purchase This Cheshire Grin Scrap Kit
At The Following Stores:-
PicsForDesigns
http://picsfordesign.com/en/catalogue/id_113094_down_the_rabbit_hole.pix
And
Mystical Scraps
http://www.mysticalscraps.com/index.php?main_page=product_info&cPath=7_205&products_id=10124
Dont Forget To Check-Out Heather's Blog
CT ChocUkDesigns For Heather's Devine Dezigns
CT ChocUkDesigns For Heather's Devine Dezigns
I Have Made This Tag Using Her Scrap Kit
Down The Rabbit Hole

You Can Purchase This Cheshire Grin Scrap Kit
At The Following Stores:-
PicsForDesigns
http://picsfordesign.com/en/catalogue/id_113094_down_the_rabbit_hole.pix
And
Mystical Scraps
http://www.mysticalscraps.com/index.php?main_page=product_info&cPath=7_205&products_id=10124
Dont Forget To Check-Out Heather's Blog
I Have Made This Tag Using Her Scrap Kit
Down The Rabbit Hole
This Crazy Kit has 107 Mad Elements & 23 Off With Your Head Papers
All With An Alice In Wonderland Theme.
I Just Love This Kit & Its Perfect For All Alice Fans
Wanting A Wonderland Theme!
You Can Purchase This Cheshire Grin Scrap Kit
At The Following Stores:-
PicsForDesigns
http://picsfordesign.com/en/catalogue/id_113094_down_the_rabbit_hole.pix
And
Mystical Scraps
http://www.mysticalscraps.com/index.php?main_page=product_info&cPath=7_205&products_id=10124
Dont Forget To Check-Out Heather's Blog
CT ChocUkDesigns For Michelle's Myths PTU Tutorial For Morbid Malay Scrap Kit
CT ChocUkDesigns For Michelle's Myths
PTU Tutorial For Morbid Malay Scrap Kit


DO NOT COPY AND SHARE
PLEASE DIRECT PEOPLE TO MY BLOG
DO NOT CLAIM AS YOUR OWN
Supplies Need:-
Scrap Kit Used: Michelle's Myth's - Morbid Malay
Which You Can Also Purchase At
PicsForDesigns
Tube: Of Choice
I Have Used Graphfreaks Mabid Malay Poser
Which The Kit Is A Match For ;)
You Can Purchase This Poser At Her Store
Please Note You Need A License To Use This Tube
Masks - Mask 43 By MoonBeams & SpiderWebs
Which You Can Download
Plug Ins - EyeCandy 4000 - Gradient Glow
MuRa's Seamless - Blend Emboss Alpha
Font Of Choice
A Working knowledge Of PSP
Lets Begin With My Tutorial
Open PSP and your Tube
Open a New 700 x 700 Resolution 200
Use The Following Drop Shadow Unless Stated
V: 2 H: -2 OP: 100 Blur: 10 Color: Black
Open & Copy Frame (6)
Paste as new raster layer
Copy & paste as New Raster Layer Your Tube/Poser
Move The Slightly Up so More Of The Top Half Is Over Lapping
Open & Copy Element (39)
Paste as new layer, move To Center Of Frame
Layers - Arrange - Move Down
Open & Copy Element (31)
Paste as New Layer - Resize By 40%
Layers - Arrange - Move Down
Activate Frame Layer
Open & Copy The Following Elements:-
Element (20) - Resize By 65% - Move To Be Inline With Bottom Of Poser
Element (45) - Resize By 85% - Move To left Handside Of Gate Pillar
Layers - Duplicate - Mirror
Element (46) - Resize By 85% - Move To Front Of Gate Pillar On Left Handside
Layers - Duplicate - Mirror
Element (36) - Resize By 40% - NO DS
Plug Ins: Eyecandy 4000 - Gradient Glow
Color: White
Glow Width: 3.00
Soft Corners: 25
Overall Op: 100
Draw Only Outside Selection Checked
Click Ok
Move To Between The Branches On Left Handside
Layers - Arrange - Send To Bottom
Element (12) - Move To Upper Left Handside Of Frame
Layers - Duplicate - Mirror
Element (28) - Resize By 60% - Move To Bottom Of Poser (See Mine For Placement)
Layers - Arrange - Bring To Top
Element (17) - Resize By 65% - Move To Right Handside Of Pillar
Layers - Arrange Move Down
Element (6) - Resize By 45% - Move To Left Handside Of Pillar
Activate Top Layer
Element (52) - Resize By 30% - Free Rotate Left By 44 Degrees
Move To Left Of Poser
Element (53) - Resize By 30% - Move To Left Of Poser
Element (50) - Resize By 30% - Flip - Free Rotate Right By 44 Degrees
Move To Right OF Poser
Element (55) - Resize By 30% - Mirror - Free Rotate Right By 44 Degrees
Move To Right Of Poser
Element (21) - Resize By 30% - Mirror - Move To Right Center Of Poser
Element (4) - Resize By 30% - Move To Left-Center Of Poser
Activate Poser Layer
Element (48) - Resize By 35% - Free Rotate Right By 22 Degrees
Layers - Arrange - Send To Bottom
Open Paper (6)
Layers - Promote Background Layer To Raster - New Mask Layer From Image
Select Mask 43 MB & SW - Make sure Source Luminance is checked only
Activate Top Layer
Layers - New Raster Layer
Selections - Select All
Return To Your Paper (KEEP SELECTED)
Copy Merged and Edit - Paste - Paste Into Selection
Selections - None
Resize By 110%
Move Slightly Up
Plug Ins: Mura Seamless - Blend Emboss Alpha
Use The Following Settings:-
Base Color R: 128
Base Color G: 128
Base Color B: 128
Emboss: 64
Base <-> Source: 255
Opague Emboss: 128
Repeat
NO DS NEEDED
NO DS NEEDED
Layers - Arrange - Send To Bottom
Activate Top Layer
Layers New Raster Layer - Add All Copyright Info
Layers New Raster Layer - Add Watermark
Layers New Raster Layer
Select Your Text Tool
Select Your Font I have used FunnyBonesJF - Size 48 - Stroke 2 - Bold
Click Foreground and change to White
Click Background and Change to Black
Type Your Name
Convert Raster To Layer
Add The Following Drop Shadow:-
V: 2 H: -2 OP: 100 Blur: 10 Color: Black
Click Ok
All Done
Thank you very much for following my Tutorial
I would love to see your results
and
any feedback
Please Email Me
At
Dont Forget To Check-Out Michelle's Blog
Tutorial Written By ChocUkDesigns
Retained by "Copyright © ChocUkDesigns 2014 All rights Reserved"
LNLM-HORF-TQVK-HHYD
Wednesday 22 October 2014
CT ChocUkDesigns For Dance In The Rain PTU Tutorial For Halloween Spook Scrap Kit
CT ChocUkDesigns For Dance In The Rain
PTU Tutorial For Halloween Spook Scrap Kit

DO NOT COPY AND SHARE
PLEASE DIRECT PEOPLE TO MY BLOG
DO NOT CLAIM AS YOUR OWN
Supplies Need:-
Scrap Kit Used: DITR's - Halloween Spook
Which You Can Also Purchase At
PicsForDesigns:-
Or
Scrap Candy
Tube: Keith Garvey's - Cruvella
You Can Purchase Her At His Store
Please Note You Need A License To Use This Tube
Please See TOU
Masks - WSL_HalloweenMask1
Which You Can Download
Font Of Choice
A Working knowledge Of PSP
Lets Begin With My Tutorial
Open PSP and Your Tube
Open a New 700 x 700 Resolution 200
Open & Copy Frame 2
Paste as new layer & Resize By 75%
Free Rotate Left By 90% Degrees
Add The Following Drop Shadow:-
V: 2 H: 2 OP: 100 Blur: 10 Color: #c0c0c0
Repeat Drop Shadow With V&H: -2
Using close up Or half of your tube
Copy & Paste as new layer on canvas (resize if needed)
Place on right hand side of frame
Add The Following Drop Shadow:-
V: 2 H: 2 OP: 100 Blur: 10 Color: Black
Repeat Drop Shadow With V&H: -2
Open & Copy & Paste The Following Elements:-
Using This Drop Shadow Unless Stated
V: 2 H: 2 OP: 100 Blur: 10 Color: #c0c0c0
Repeat Drop Shadow With V&H: -2
Element 26 - Resize By 50% - NO DS
Layers - Duplicate - Mirror - NO DS
Layers - Merge - Merge Down
Layers - Arrange - Send To Bottom
Activate Frame Layer
Element 74 - Resize By 75%
Element 19 - Resize By 50%
Element 12 - Resize By 50% - Mirror
Element 41 - Resize By 50%
Element 18 - Resize By 30%
Element 49 - Resize By 15%
Element 72 - Resize By 30%
Element 79 - Resize By 30%
Element 57 - Resize By 30%
Element 47 - Resize By 20%
Element 47 - Resize By 20%
Element 73 - Resize By 75% - Mirror
Element 15 - Resize By 30% - Place On Bottom Left Handside Of Frame
Layers - Duplicate - Mirror - Move To Handside Of Frame
Layers - Merge - Merge Down
Layers - Duplicate - Mirror
Layers - Merge - Merge Down
Layers - Arrange - Move To Bottom
Element 23 - Resize By 90% - Free Rotate - Right By 44 Degrees
Open Paper 31
Layers - Promote Background Layer To Raster - New Mask Layer From Image
Select Mask - WSL_HalloweenMask1 - Make sure Source Luminance is checked only
Copy Merged and Paste as new layer
Layers - Arrange - Send To Bottom
Resize By 75%
Activate Top Layer
Layers New Raster Layer - Add All Copyright Info
Layers New Raster Layer - Add Watermark
Layers New Raster Layer
Select Your Text Tool
Select Your Font I have used Penshurst Shadow - Size 48 - Stroke 2 - Bold
Click Foreground and change to Black
Click Background and Change to #808080
Type Your Name
Convert Layer To Raster Layer
Add The Following Drop Shadow
V: 2 H: 2 OP: 100 Blur: 10 Color: #c0c0c0
Repeat Drop Shadow With V&H: -2
All Done
Thank you very much for following my Tutorial
I would love to see your results
and
any feedback
Please Email Me
At
Dont Forget To Check-Out DITR's Blog
Tutorial Written By ChocUkDesigns
Retained by "Copyright © ChocUkDesigns 2014 All rights Reserved"
UTPC-URI1-OGP1-CHHF
Subscribe to:
Posts
(Atom)
Copyrighted

My Stores


My CT


Who I CT For


Who I Guest CT For

CTs I Manage
CU License


